How to Render Animations in FluidRay
In this tutorial we will show you how to quickly render camera animations in FluidRay.
If you are a designer, sometimes making a quick video is the most effective way to show your product to a client. Or, if you are an Architect, a camera walk-through can immerse your clients in the spaces you have created for them.
Making such videos is really easy in FluidRay.
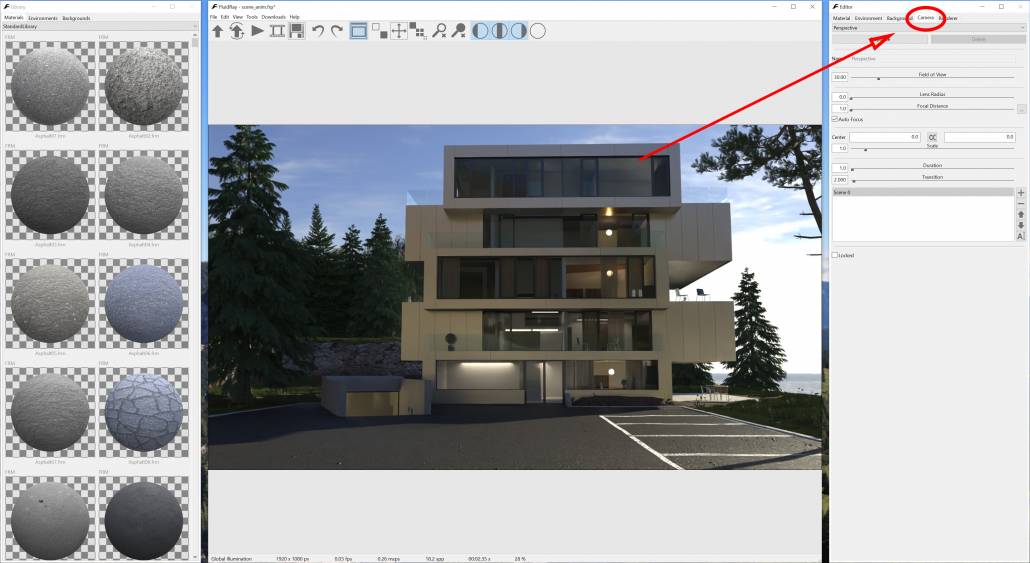
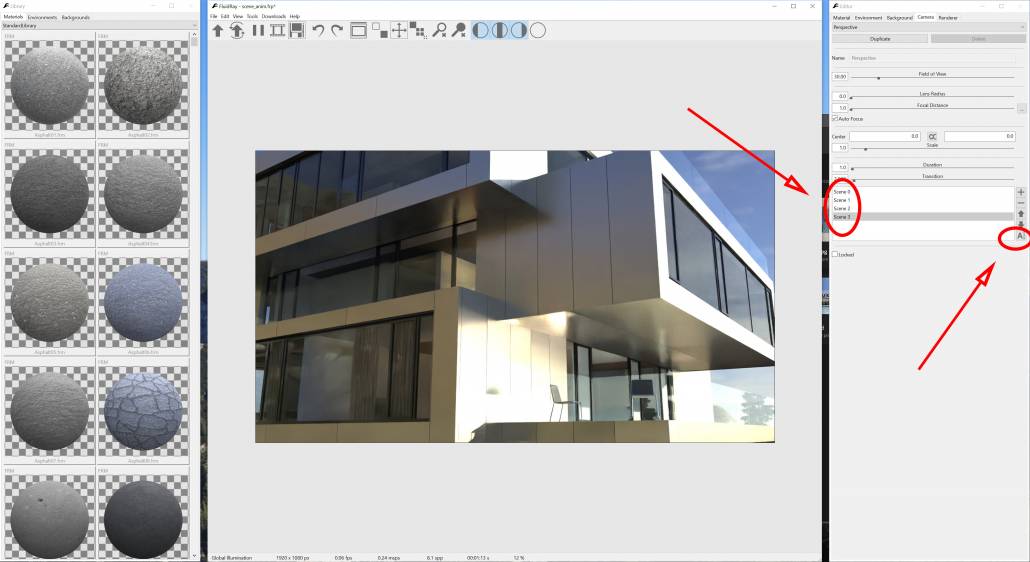
Start by loading your project, then navigate to the Camera tab on the Editor window that is located on the right.
There are a few buttons on the bottom right of the panel that allow you to manipulate the different “Scenes”:

A “Scene” is a point of view that your camera will go through. After you have added a few scenes with different point of views, FluidRay will automatically create an animation by transitioning between them.
Click on the “+” button to add a new scene, then move the camera to another point of view:
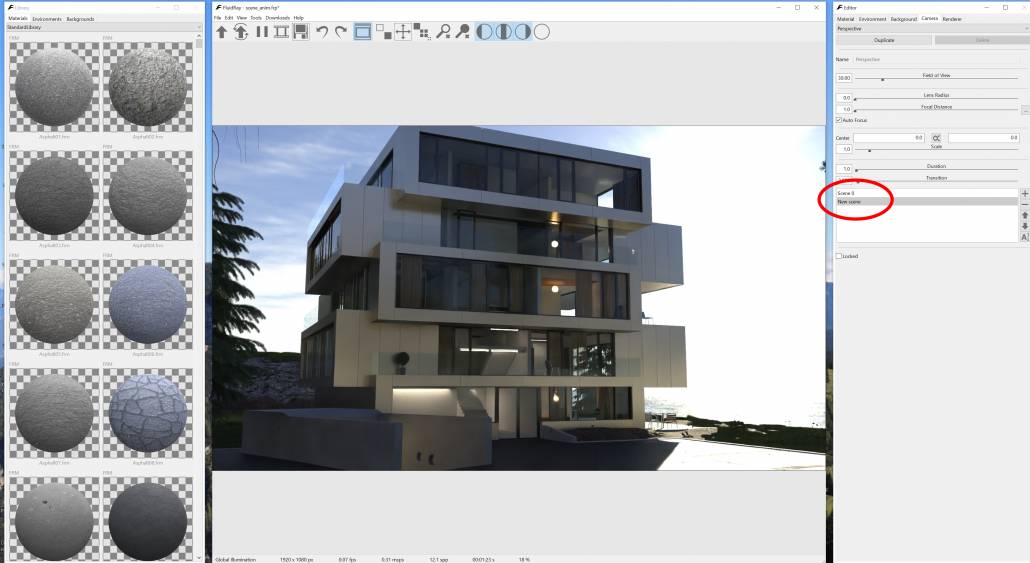
Keep adding points of views to cover all the walkthrough.
You can also rename the scenes by clicking on the corresponding name or by clicking on the “Rename” button:
Two parameters are important for animation – Transition and Duration:
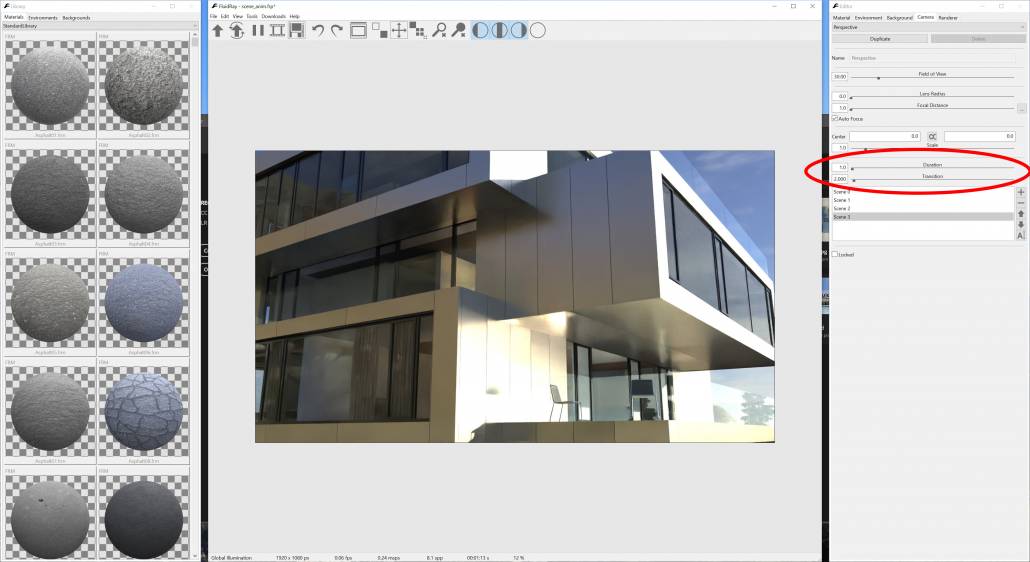
- Duration: how long, in seconds, the camera stays fixed in the same point of view
- Transition: how long, in seconds, the camera takes to go from a point of view to the next
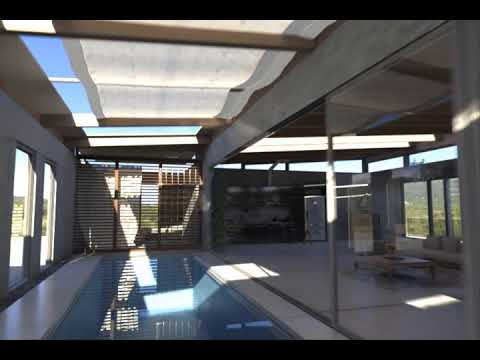
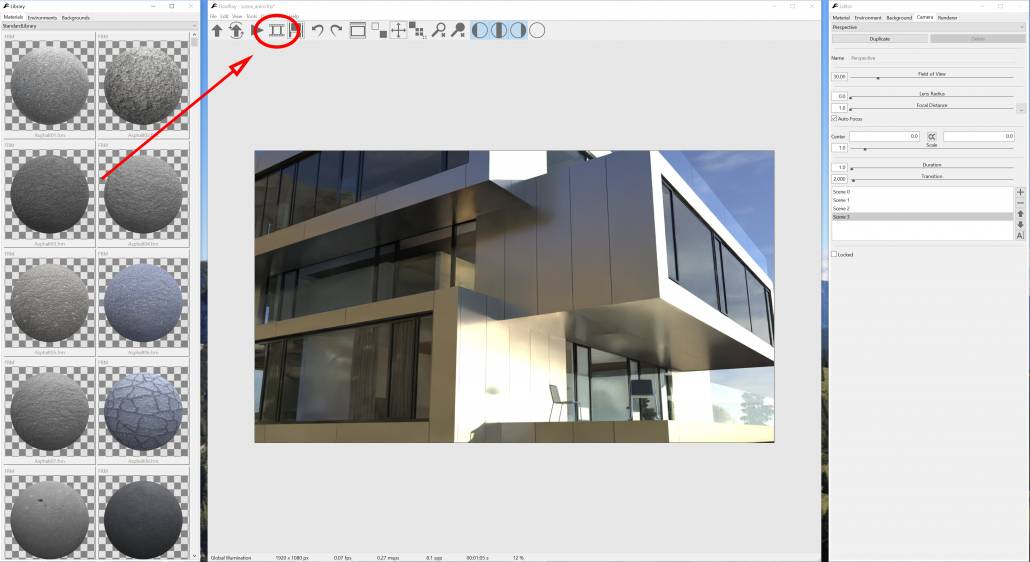
We can now ready to render our animation. To access the render animation dialog, press the “Reel” button on the main toolbar or go to the menu Tools -> Render Animation:
The Render Animation dialog appears:
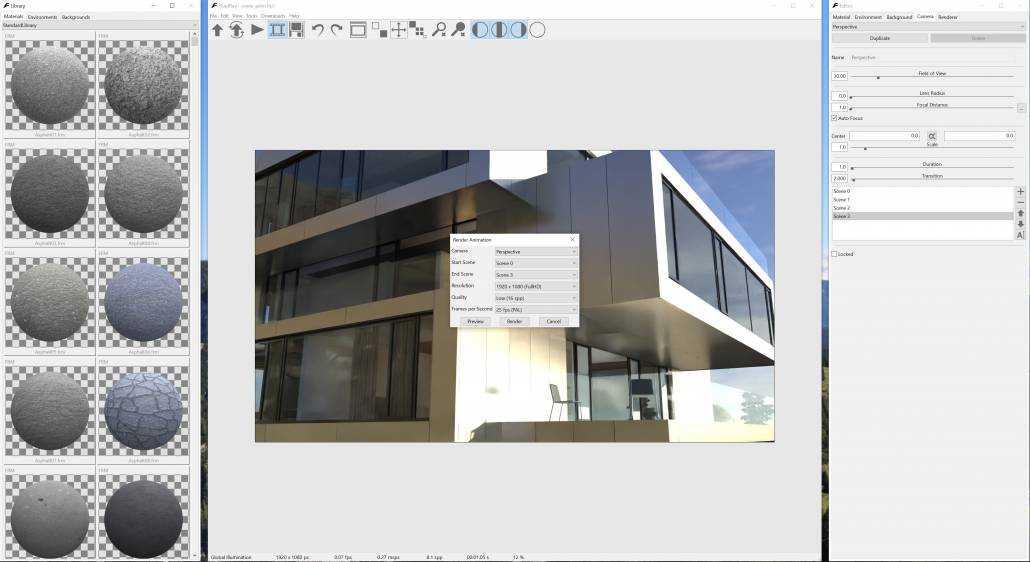
The following options are available in the Render Animation dialog:
- Camera: the camera to be used for the animation
- Start Scene: the scene (point of view) where the animation starts
- End Scene: the scene (point of view) where the animation ends
- Resolution: animation resolution. The smaller the resolution the less time it will take to render the animation
- Quality: the samples per pixels used to render the animation. Lower values will result in lower quality but quicker render times.
- Preview: the preview button will show a quick preview of the animation, useful to check the animation before starting the final render.
- Render: the render button starts rendering the animation.
By clicking the Render button you’ll be asked the location where to save the rendered animation:
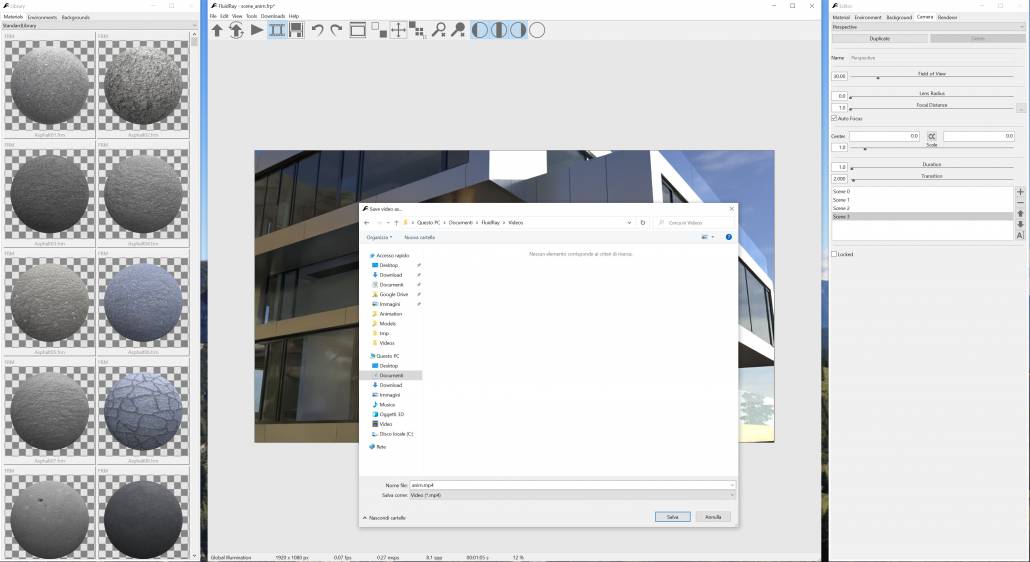
Note that when selecting the location where to save the video, it’s also possible to decide if to save the animation as a video file (.mp4) or as multiple image files to be joined together at a later time.
This concludes the tutorial. If you have questions, please post them on our Discussion Forums.
If you would like to try FludRay, download the FREE TRIAL.
Improve Your SketchUp Interior Design Rendering Skills With These Tutorials
Are you an interior designer learning how to render your 3D SketchUp models? Rendering interiors in FluidRay is very easy, quick, and affordable. Designers don’t need expensive hardware because our software runs smoothly on most computers. Also, FluidRay creates designs in real-time so designers can see and modify their work as they go. If you are new to rendering or just new to FluidRay, we invite you to explore our tutorials to help you get the most out of FluidRay. We will help you create beautiful renderings that will impress your clients!
Try FluidRay for Free!


FluidRay includes many features to help you create a realistic rendering.
- Fast rendering allows you to create and edit in real-time without long processing times
- Extensive library of textures and materials
- Lightning fast lighting options
- Superior caustics enable you to include realistic pools and other water features
- Exact camera positioning so you can display your designs from multiple angles
- Precise emissive materials make creating light from a fireplace or television painless
- Efficient textures mean designers don’t need a computer with extra memory
In case that isn’t enough to convince you, FluidRay offers interior designers many benefits including:
- Ability to create more detailed designs: Clients can better visualize the entire project and sample different items like materials, fixtures, paint colors and lighting. Seeing the final design makes it easy for a client to visualize their space and ultimately select you as their designer.
- Money in your pocket: By examining the design details early, issues and needed changes become apparent early. Addressing issues before materials are purchased keeps the project moving forward and avoids costly delays.
- Impressed clients: Your design presentations will highlight your abilities in an impressive, easy-to-view format. Design is highly competitive and presentations must be attention grabbing. Renderings do exactly that. You’ll create excitement and win over even the most demanding of clients.
- Flexibility to change options in real time or quickly present multiple design options: Clients are notorious for not knowing exactly what they want or they change their minds several times during the design process. Using a rendering tool, like FluidRay, allows for multiple design options to be shared and details to be modified in real-time to better facilitate the process. When clients can see multiple options, decisions are made quickly which, in turn, shaves time off a project.
- Effective communication: Sharing design ideas and iterations is certainly one of the most important aspects of the relationship between designer and client. Because of FluidRay’s real-time nature, modifications are made in seconds enabling communication between you and your client to move forward efficiently.
The following tutorials will teach you how to create beautiful renderings from your 3D SketchUp models.
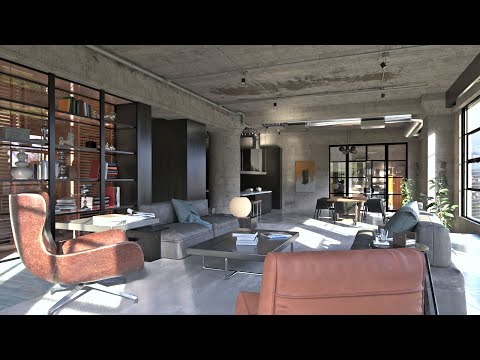
Interior Rendering Tutorial with SketchUp and FluidRay
How to Set Textures, Materials, and Lighting with FluidRay
How to Perfect Your SketchUp Model Environment in FluidRay
FluidRay’s extensive features, easy-to-use interface, quick rendering capabilities, affordability, stunning designs, and SketchUp compatibility make it the perfect rendering software for interior designers.
If you want to experience how FluidRay can help you inspire your clients, download our software for a free trial. Our pricing is inexpensive so anyone can experience the good side of rendering!
5 Expert Tips for a Beautiful Architectural Rendering
Make no mistake about it, creating the perfect architectural rendering can be time consuming and frustrating. The amount of detail, materials, colors, and textures that go into creating a beautiful rendering can quickly become overwhelming. With that said, a few simple tips can help take your architectural rendering to the next level so you can effectively communicate your designs and architectural talents to your clients. When done right, renderings will set you apart from your competition and demonstrate your capabilities. The FluidRay team has curated our 5 top expert tips to help you create beautiful architectural renderings.

1. Create Believable Surroundings
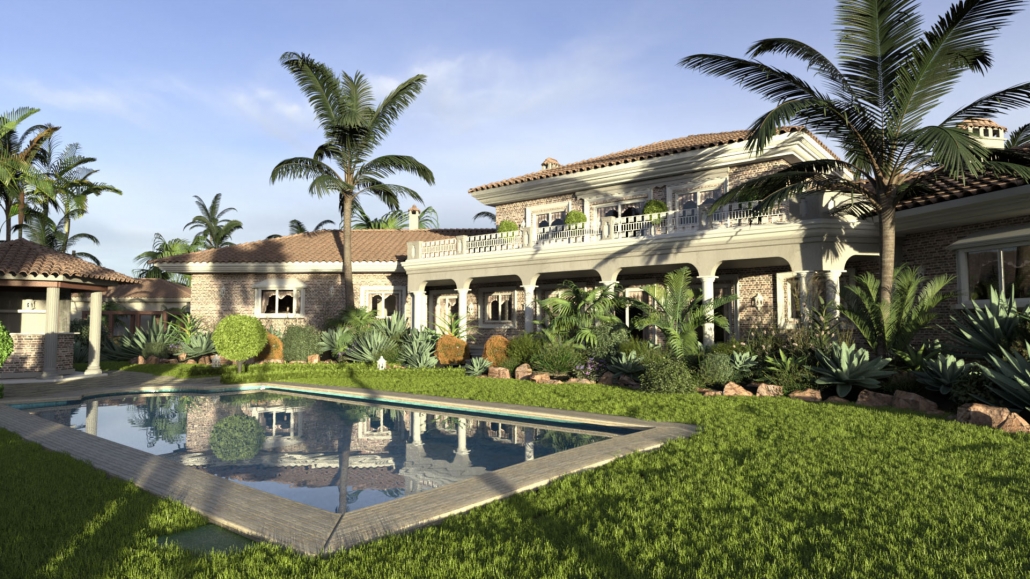
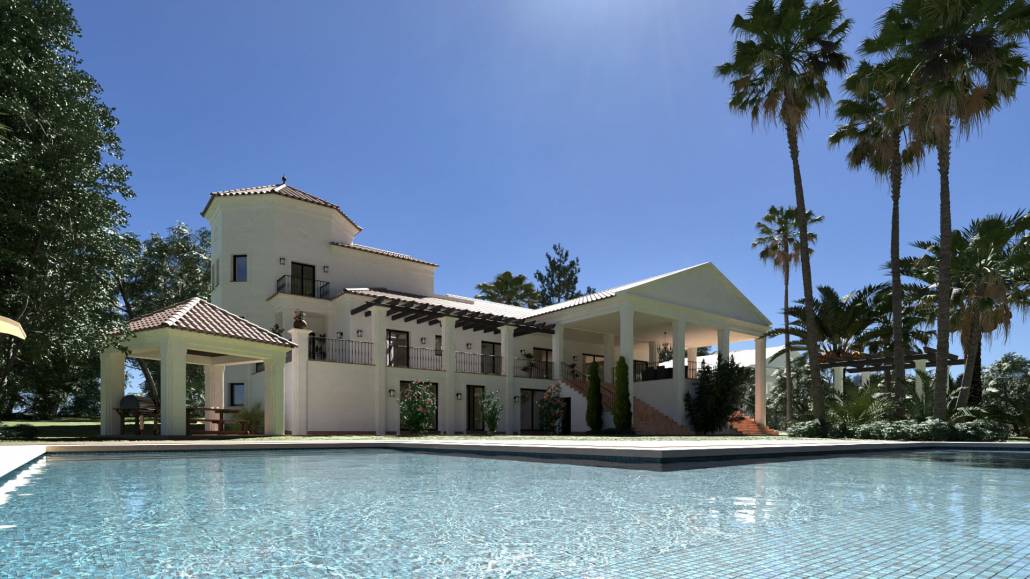
To create a realistic architectural rendering, include believable surroundings to help set the feeling of the image. Selecting an appropriate background will draw the viewer into the rendering and help them experience the details of the final architectural design. Consider details like sky, ground, natural bodies of water, trees, and other nearby structures and aim for simple, yet accurate, details. Use natural colors and minimize complicated scenes for an architectural rendering that will impress viewers and highlight your architectural design abilities.
2. Illuminate, Illuminate, Illuminate
One of the most important aspects of an architectural rendering is the lighting. You’ll want to pay attention to both environmental lighting and artificial lighting. Creating these lighting effects in FluidRay is fast, easy, and produces beautiful results that will impress your clients! Get this right and your rendering is realistic and beautiful. Done incorrectly though, your rendering is awkward. Luckily, with a little attention, illuminating your architectural rendering properly is easy. In fact, this short architectural rendering tutorial explains how to set lighting in your FluidRay rendering. Note, that while this tutorial starts with a Rhino 3d model, FluidRay is compatible with most 3d modeling software applications.

3. Take Advantage of Caustics
Caustics are the flickers of light that come off water and are a significant contributor to lighting in the real world. In rendering, these flickers are often quite tricky to perfect. Designers will often avoid the need for caustics by leaving water out of their renderings. Including caustics though makes a rendering that much more believable. FluidRay handles caustics effectively and efficiently, allowing you to take advantage of this important lighting detail. Go ahead and include fountains or ponds in your architectural rendering!
4. Refine Textures and Materials
An architectural rendering incorporates many colors, textures, and materials. Certain materials and textures will look different depending on the situation and especially the time of the day. For example, if your rendering is intended to look like a photograph shot during the morning golden hour, you’ll want the rendering to look bright and warm and not “orangey”. Refine textures and materials to look realistic to the environment and include the appropriate level of dullness or shine. This tutorial describes how to apply textures and materials to your rendering. Because FluidRay renders in real-time, you can quickly adjust textures and materials in the viewport until the rendering looks just right.
5. Determine Your Focal Point/Camera Position
Setting the focal point of a rendering to be viewed from a specific angle or point of view allows you to create a certain tone and more natural look. Perhaps you want your image to be viewed from above or from an angle. Or, perhaps you want to focus on a small portion of the building to highlight a specific feature. Consider what you are trying to emphasize in your rendering and choose a focal point accordingly.
FluidRay helps architects easily create beautiful architectural renderings. If you want to experience the power of how FluidRay can help you create expert architectural renderings, download our software for a free trial. Our pricing is inexpensive and we offer an extensive library of tutorials so anyone can experience the good side of rendering!
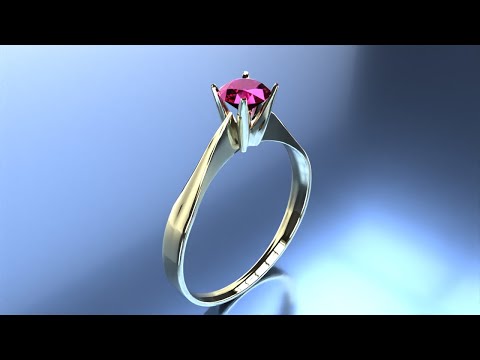
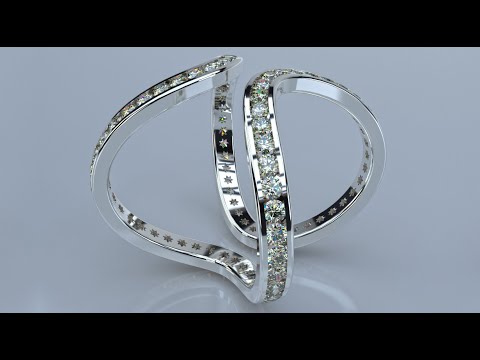
FluidRay: Jewelry Design Rendering Software
Jewelry designers traditionally would create jewelry designs with pencil and paper to share design ideas. Next, the jewelry piece was carved out in wax or plastic to give customers an opportunity to interact with the prototype and decide if the piece was right. While many designers still create models this way, rendering software will take a jewelers design ideas to the next level. Now, it is much more convenient, fast, and cost effective to create realistic models using a rendering software, like FluidRay, to communicate design ideas. Are you a jewelry designer who is considering incorporating rendering software into your workflow? Keep reading to learn more about the many benefits rendering software offers to jewelry designers.
Benefits to Using FluidRay Rendering Software for Jewelry Design:
Design in Real Time
Quickly share multiple design options and adjust jewelry designs on the fly. Decisions are made quickly and efficiently to shave time off your projects.
Save Money
Design issues are discovered early, before materials are purchased, avoiding costly mistakes.
Create Detailed Designs
Customers can better visualize the final piece and sample different materials, shapes, and colors.
Communicate Ideas
Communicate design ideas and modifications to your customers quickly and effectively to keep projects moving forward.
Impress Customers
Create attention grabbing design presentations that highlight your vision and abilities winning over even the most demanding of customers.
Learn Quickly
FluidRay’s intuitive interface and straightforward menus make rendering fast and easy to learn.
Designers can create beautiful renders in 4 simple steps:
1. Import 3D Model
Directly in the FluidRay dashboard, you can import your 3d model created in a modeling tool such as SketchUp, Rhino, AutoCAD or other, simply by selecting Import from the main menu. Once your model is created, import the file into FluidRay.
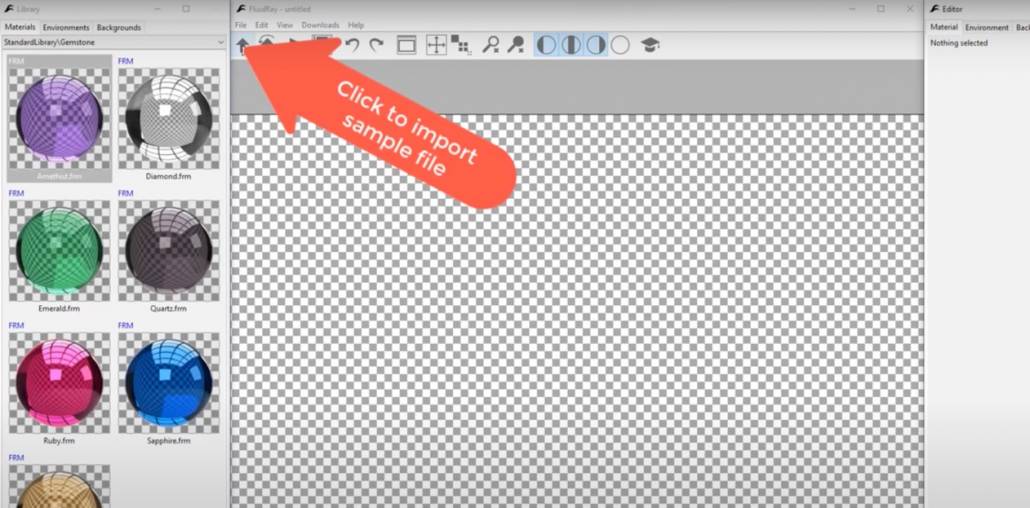
FluidRay works directly with SketchUp (.skp), Rhino OpenNurbs (.3dm), FBX (.fbx), Alias Wavefront (.obj), Collada (.dae), 3DS (.3ds, .ase), DirectX (.X), Stanford PLY (.ply), and STereoLithography (.stl).
If your filetype isn’t listed here, simply export to an .fbx file within your 3D modeling software and then import into FluidRay.
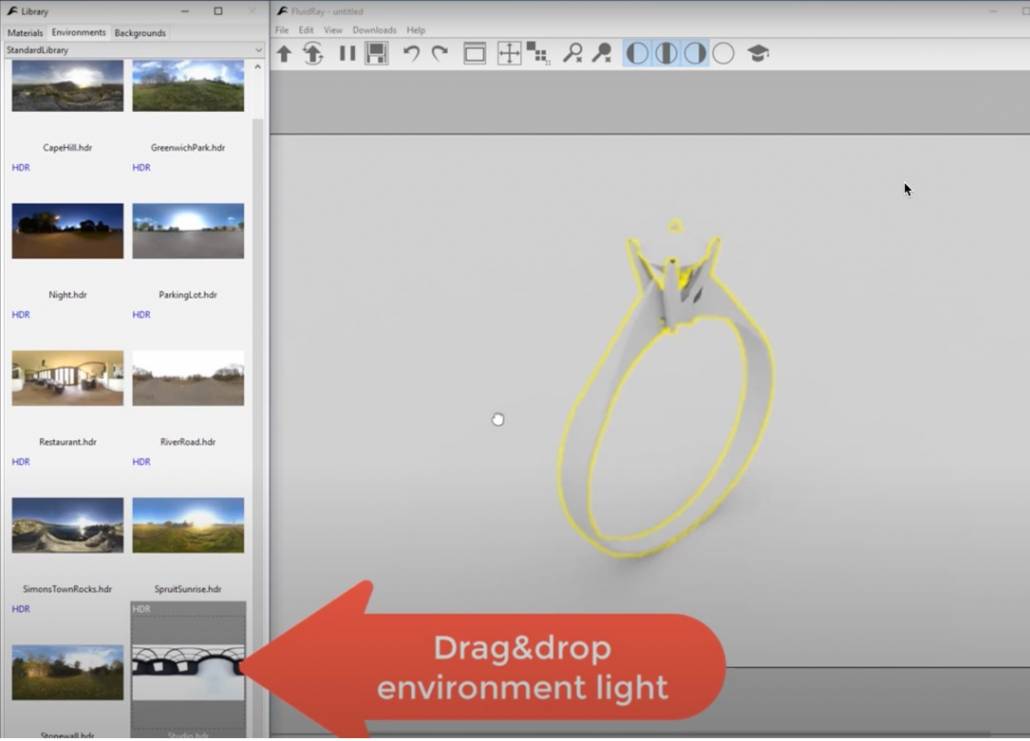
2. Apply Lighting
Environmental light comes from the outside, rather than from the inside. Environmental light is a global parameter, meaning it will affect the entire jewelry rendering, not only one part of it. Apply environmental lighting to your jewelry design to give it a realistic look and feel.
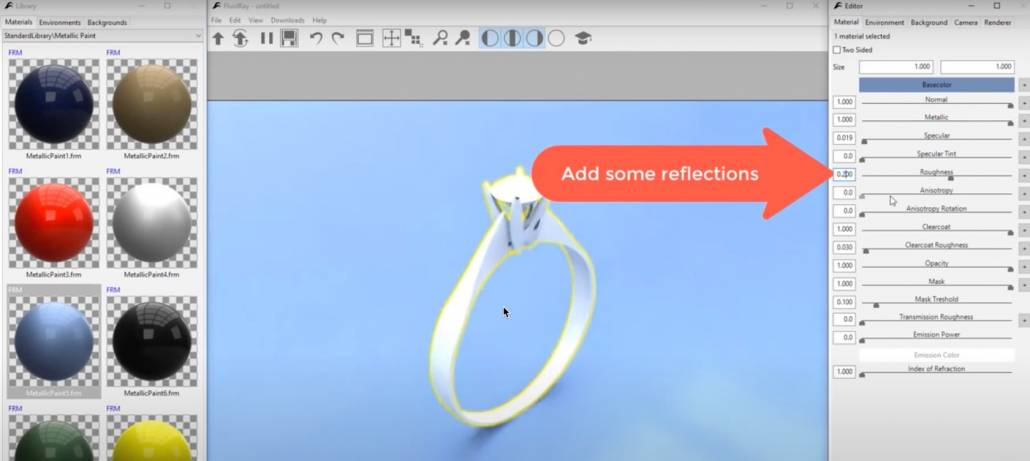
3. Add Reflections
Reflections add to the realistic nature of a rendering, particularly with jewelry or other metal materials. Adjust the reflections in real-time until the piece looks just right.
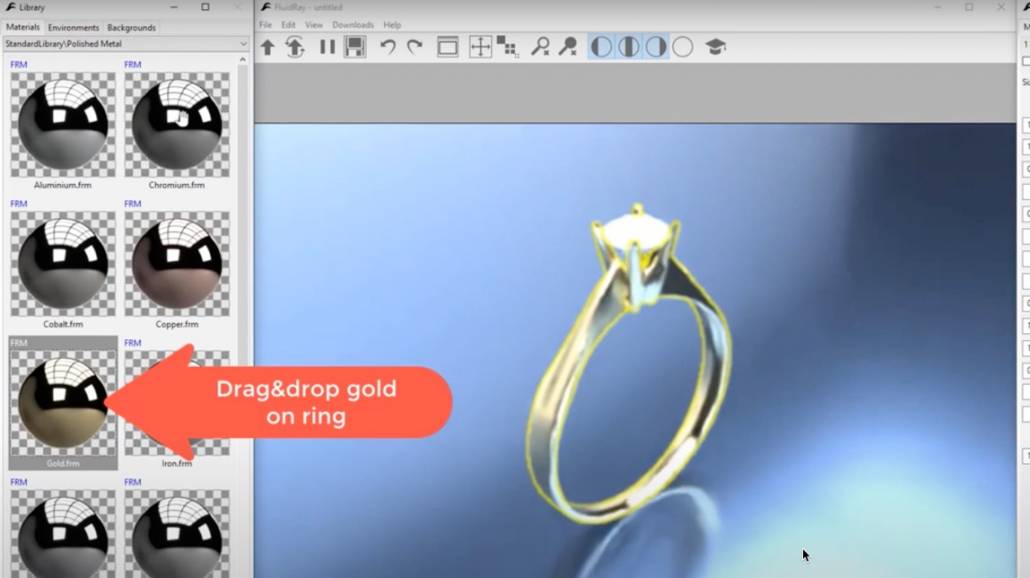
5. Assign Materials
Finally, we assign materials to the model to finish the jewelry piece. In this example, we start by adding gold. Once that is set, add the gem and you can see how the materials will react in real-time when adjusting the lighting and reflections. FluidRay’s extensive library of materials allows designers to create shapes and apply different materials until the rendering looks exactly right. Making beautiful previews of your jewelry designs is easy with FluidRay. In just a few minutes you can turn your jewelry prototype into a real-life photo-realistic image.
This video provides a quick tutorial on how to create a jewelry rendering in FluidRay.
Are you ready to learn rendering for your next jewelry design project? Our pricing is inexpensive and we offer a free trial so you can see how fast and easy it is to turn your 3D models into realistic images that will inspire your jewelry customers. To learn how to create beautiful jewelry renderings in FluidRay, we provide a library of training tutorials.
See for yourself how quickly you can go from a 3D model to a beautiful FluidRay rendering. Experience the good side of rendering today!
Try FluidRay For Free!
Discover Why FluidRay is Considered the Easiest Renderer to Learn
More and more designers are using rendering tools to showcase their work to current and potential clients. Whether you are creating architectural designs, interior designs, jewelry designs or other product designs, FluidRay is easy to incorporate into your workflow with our tutorials, support, and online community.
Benefits to incorporating a rendering tool into your design organization
- Creating more detailed designs: Clients can better visualize the entire project and sample different items like materials, fixtures, paint colors and lighting. Seeing the final design makes it easy for a client to visualize their future building, room or product and ultimately select you as their designer.
- Saving money: By examining the design details early, issues and needed changes become apparent early. Addressing issues before construction begins or materials are purchased keeps the project moving forward and avoids costly delays.
- Impressing clients: Your design presentations will highlight your abilities in an impressive, easy-to-view format. Design is highly competitive and design presentations must be attention grabbing. Renderings do exactly that. Because of the real-time nature of FluidRay, you can adjust designs on the fly; creating more excitement and winning over even the most demanding of clients.
- Changing options in real time or quickly present multiple design options: Clients are notorious for not knowing exactly what they want or they change their minds several times during the design process. This is natural and should be expected and incorporated into timelines. Using a rendering tool, like FluidRay, allows for multiple design options to be shared and details to be modified in real-time to better facilitate the process. When clients can see multiple options, decisions are made quickly and efficiently shaving time off a project.
- Communicating ideas: Effective communication of design ideas and iterations is certainly one of the most important aspects of the relationship between designer and client. Because of FluidRay’s real-time nature, modifications are made in seconds enabling communication between you and client to move forward efficiently.
When asked about incorporating a rendering tool into their organization, many designers indicate they don’t have the time or (frankly) the interest in learning another modeling tool. They aren’t able to spend time creating renderings when a 3d model created in Rhino, Sketchup, or similar is acceptable. While taking it to the next level would certainly be ideal, it is simply not worth the additional time and money. However, once these same designers realize how easy FluidRay is to learn and consider the benefits, they do in fact begin to use a rendering tool. This is exactly what happened to THE small HOUSE CATALOG. After displaying rendered designs on https://smallhousecatalog.com/, the company saw more than a 20% increase in online sales!
What makes FluidRay so easy to learn?
- Clear tutorials: FluidRay offers free tutorials that describe the details on how to create and refine renderings. Check out these examples or view them all on our HELP page.
Interior Rendering Tutorial

Architectural Rendering Tutorial
Jewelry Rendering Tutorial
- Accessible costs: FluidRay offers a free 10 day trial to get designers up and running with no commitment.
Once your free trial is complete, FluidRay offers an affordable monthly plan.
- Available support: The FluidRay support team is available to help with issues and questions as you learn about the FluidRay features and create renderings. Simply submit a question and someone from support will get back to you quickly. Additionally the online community of FluidRay users posts questions and answers to help other users navigate the tool.
- Works on most Windows or Mac computers: FluidRay doesn’t require any special equipment or high powered machines. Simply download FluidRay and start rendering in minutes.
- Real-time renderings: You can see your work immediately and make real time adjustments as needed. No waiting to see if your design looks right.
Are you ready to learn rendering for your next design project? Our pricing is inexpensive and we offer a free trial so you can see how fast and easy it is to turn your 3D models into realistic images that will inspire your clients. To learn how to create beautiful renderings in FluidRay, we provide a library of training tutorials. Experience the good side of rendering today!
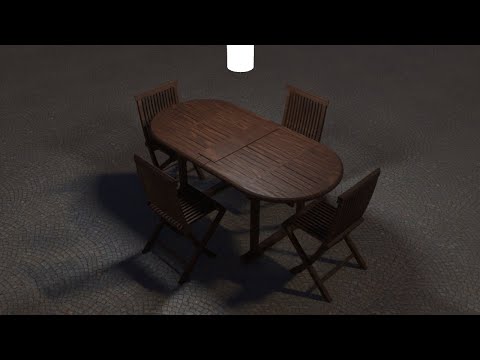
Jewelry Rendering Tutorial with Rhino and FluidRay
We just released a new tutorial video on how to render jewelry designs with Rhino and FluidRay:
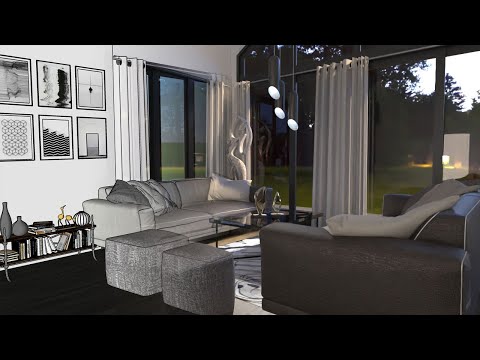
How to Create Realistic Interior Lighting with FluidRay
We are in trying times. No matter each of our specific situations, everyone has been affected by the global pandemic and we’ve all had to modify our day to day lives in order to keep our communities safe. The FluidRay team wishes everyone the best as we all adjust.
Are you able to work remotely? Why not use this time to refine your rendering skills with these tips on how to use FluidRay to create renderings with realistic lighting?
Proper interior lighting is crucial when designing an interior, particularly when working to create the ambiance of a room. Lighting adds both style and function and determines the mood of the space. Perfecting the lighting effects in 3D renderings enables designers to accurately communicate the intended mood for a room. Creating lighting effects in FluidRay is fast, easy, and produces beautiful results that will impress your clients!
Keep reading for detailed instructions on how to bring your renderings to life with interior lighting.
Step 1: Import Your 3D Model
Create your 3D model in your favorite modeling software. We used SketchUp for this example.
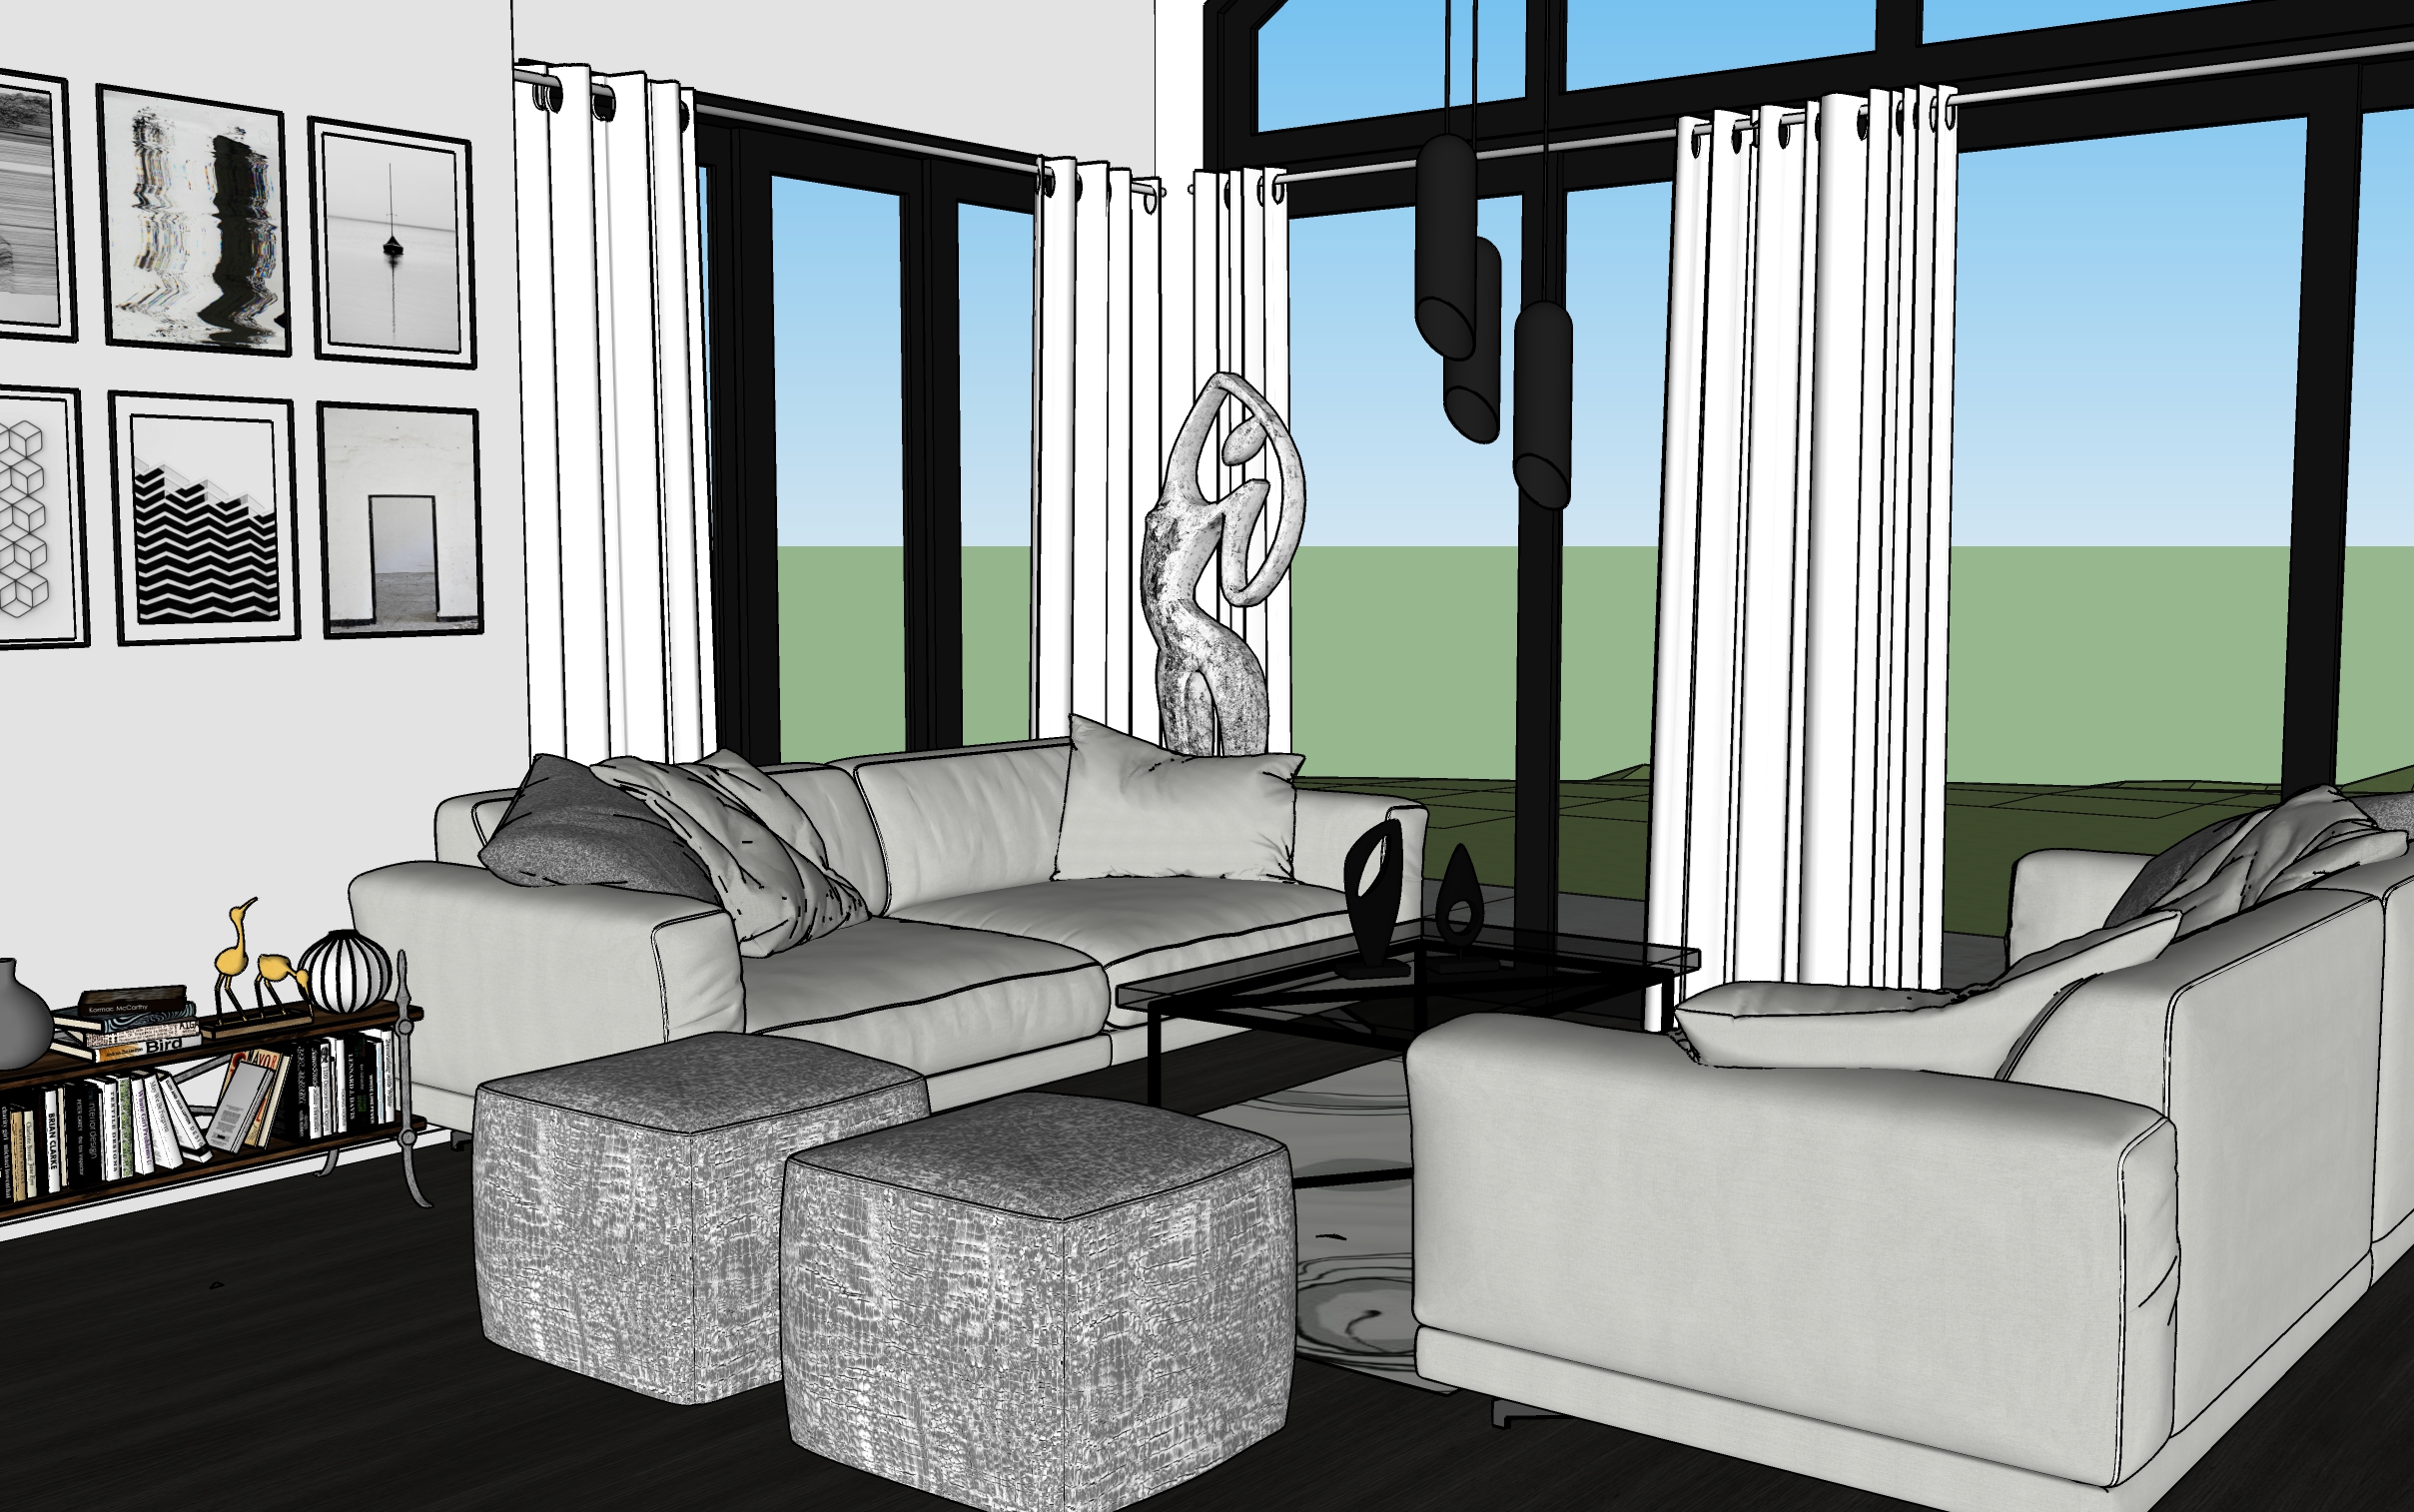
livingroom.skp
Once your model is created, import the file into FluidRay.

FluidRay works directly with SketchUp (.skp), Rhino OpenNurbs (.3dm), FBX (.fbx), Alias Wavefront (.obj), Collada (.dae), 3DS (.3ds, .ase), DirectX (.X), Stanford PLY (.ply), and STereoLithography (.stl).
If your filetype isn’t listed here, simply export to an .fbx file within your 3D modeling software and then import into FluidRay.
Step 2: Set Materials
Let’s begin by setting the materials in the model. By setting materials before adjusting the lighting, you can see how the materials will react in real time when adjusting the lighting. Select an object from the model and then from the drop down menu in the Materials tab, drag and drop the desired material into your rendering. FluidRay has a large library of high quality materials from which to choose and the ability to import additional materials.
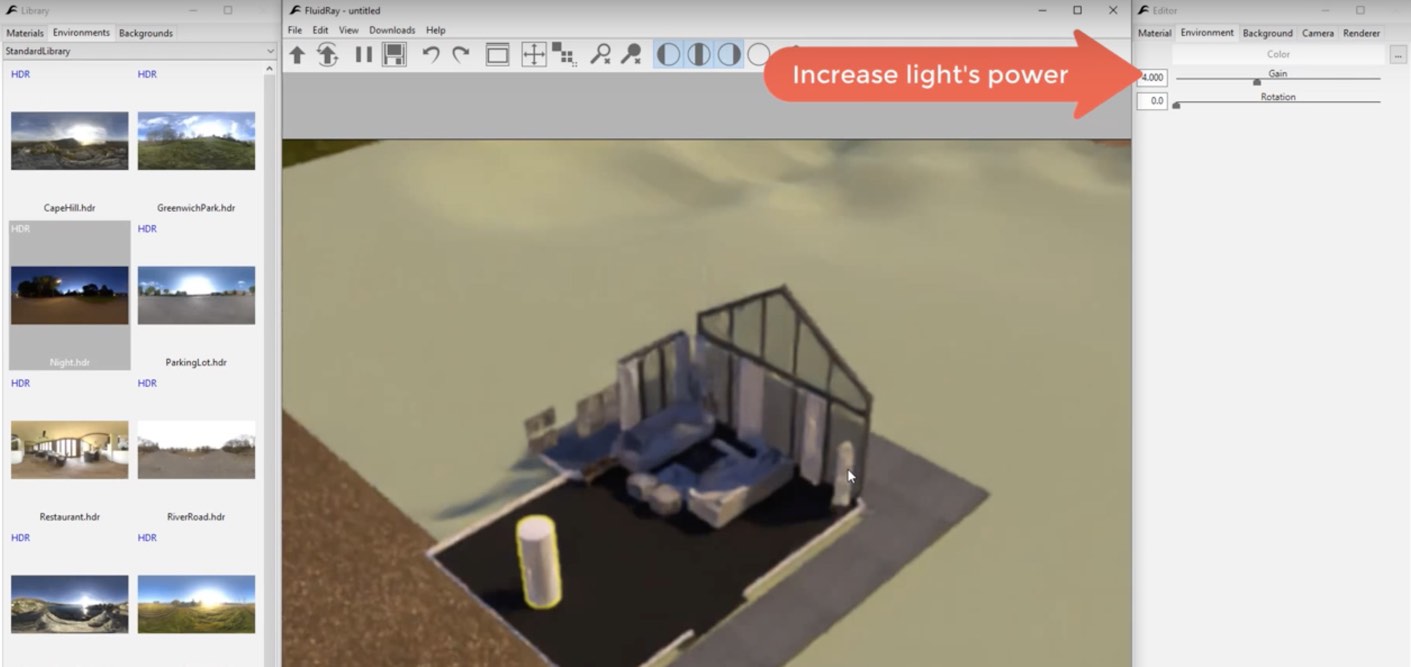
Step 3: Add Environmental Light
Environmental light comes from the outside, rather than from the inside. Environmental light is a global parameter, meaning it will affect the entire rendering, not only one part of it.
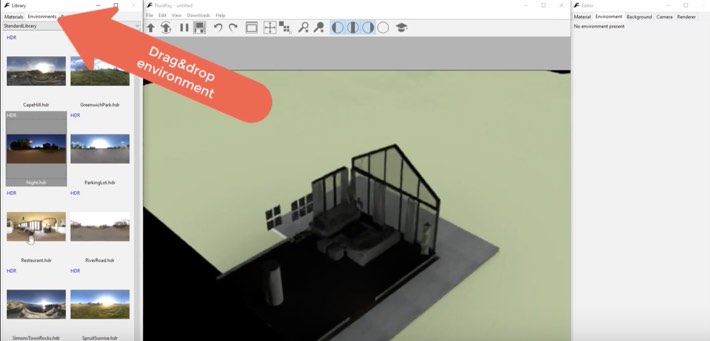
In this example, we start with the night environment and then we increase the light’s power.
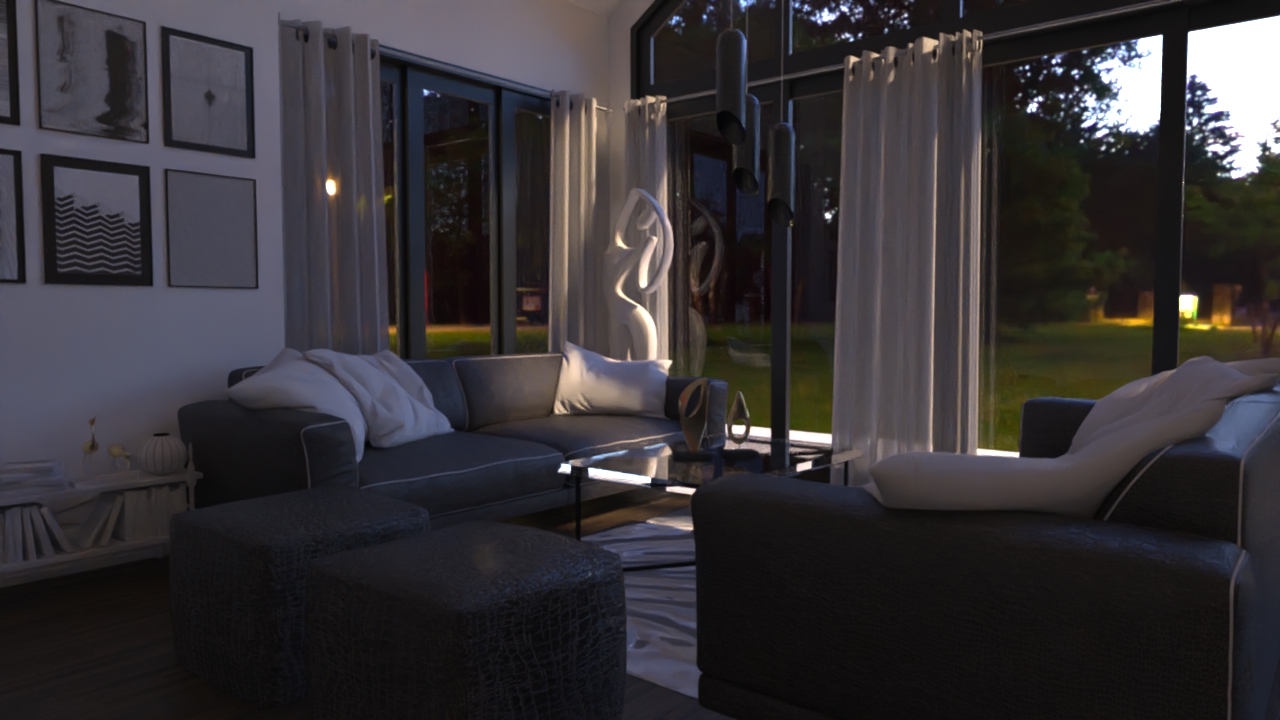
You can see the room in our model takes on light from the environment as if it is night time outside. Increase the light’s power in the right panel using the Environment tab.
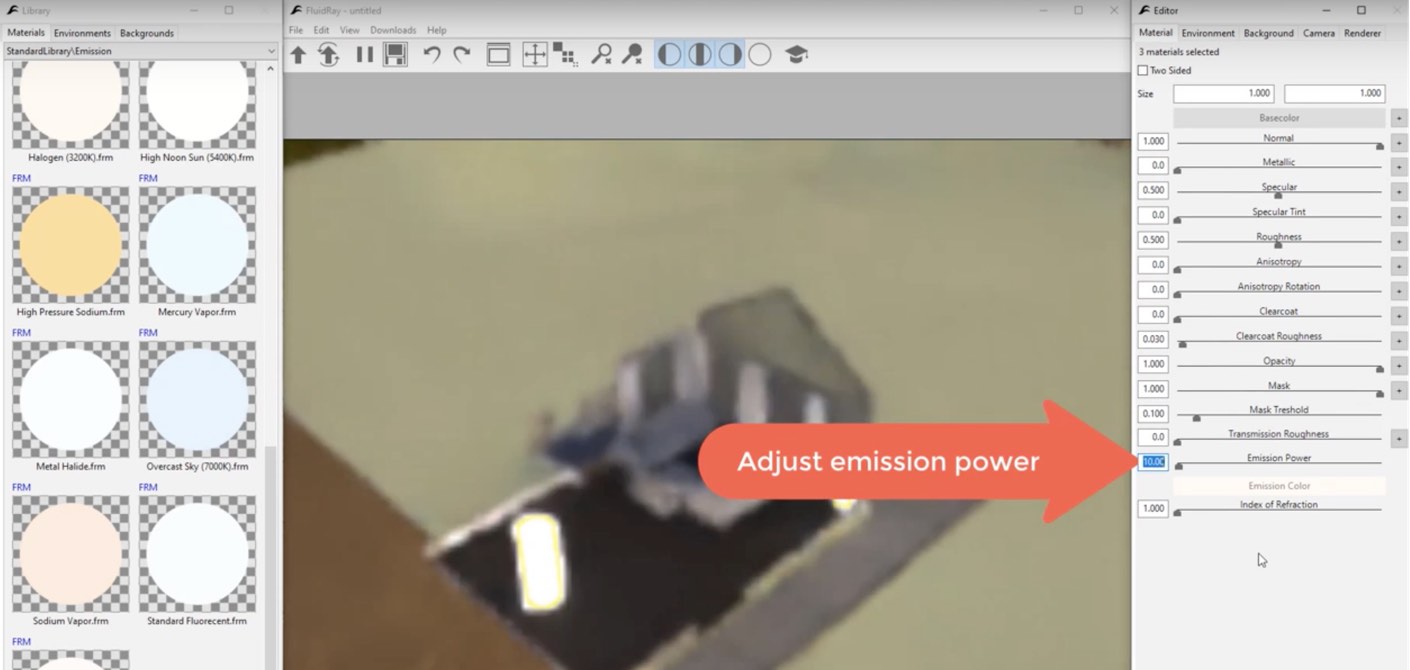
Step 4: Add Artificial Light
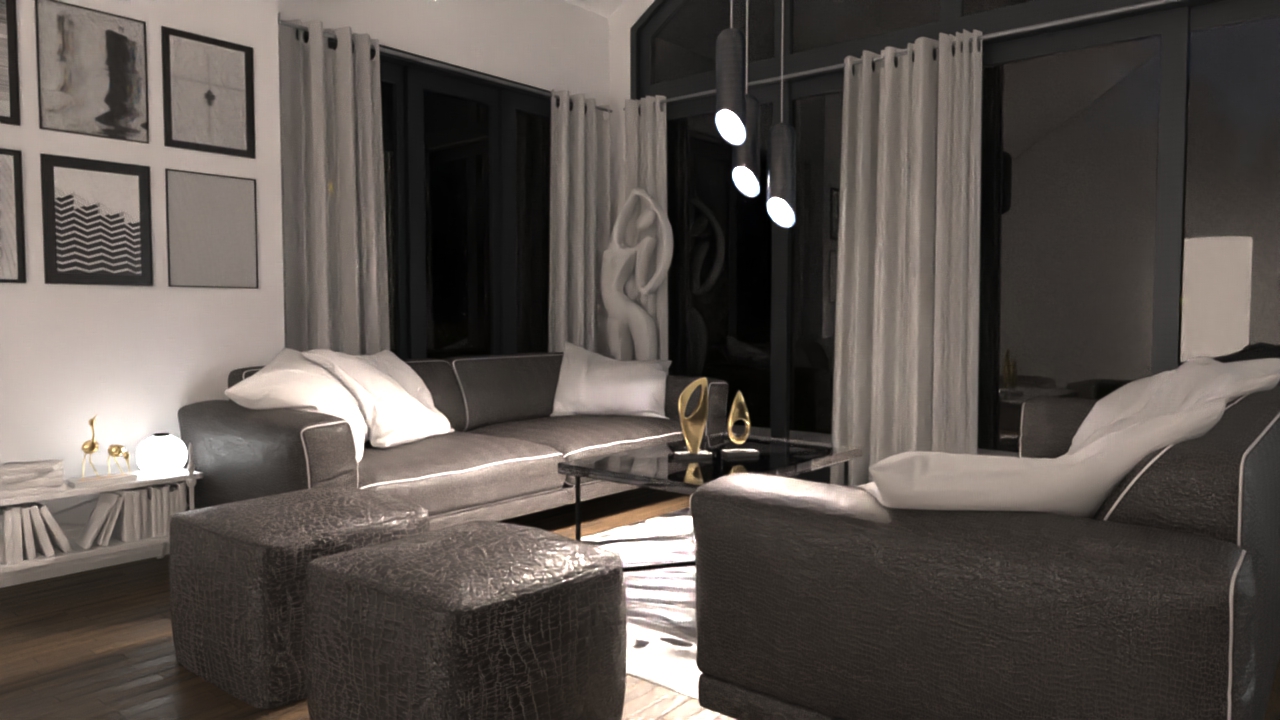
Artificial light includes overhead lights as well as table or floor lamps. We recommend applying the artificial light first without the environmental lights. Simply select the surface you want to emit light and tweak its emission power and color. You can also drag and drop an emissive material onto the surface.
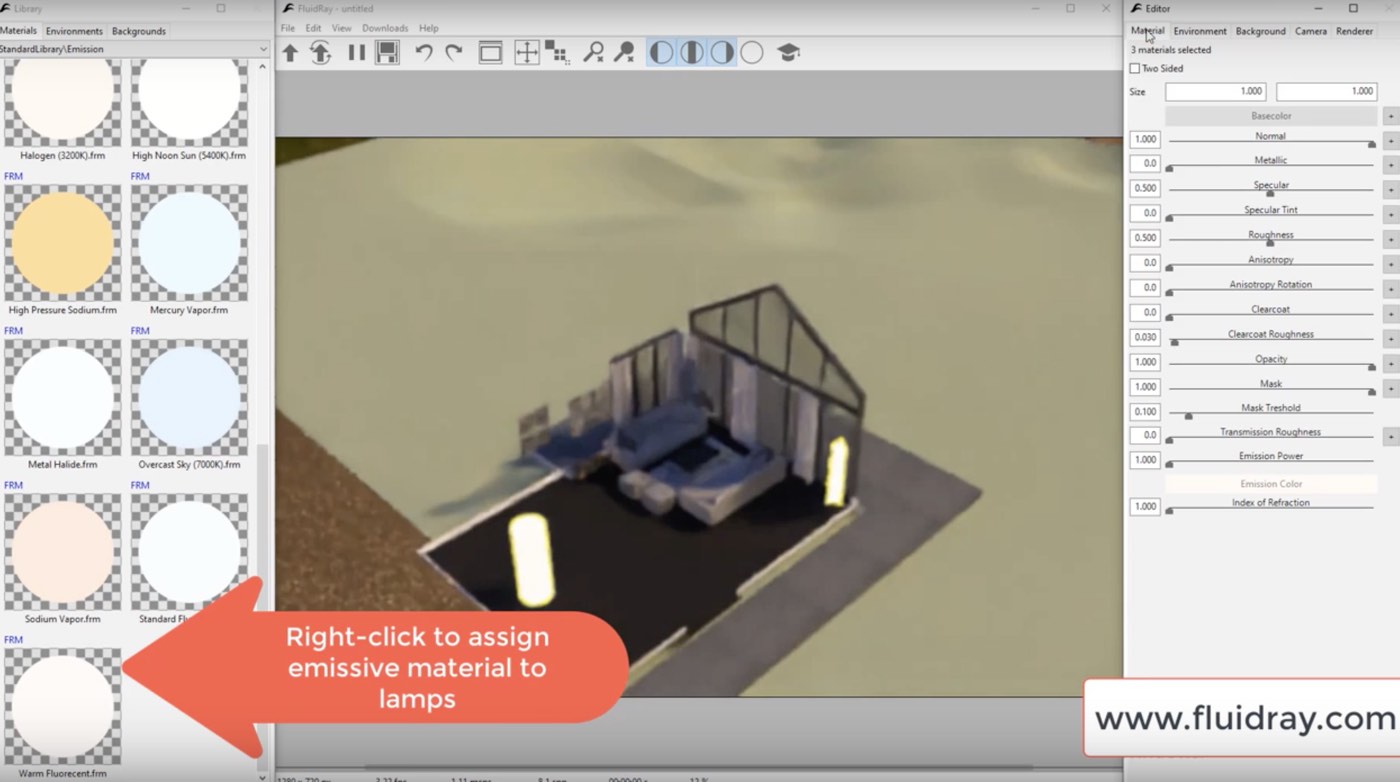
Go through these same steps for each of the artificial lights in your rendering.
Step 5: Turn Environmental Light Back On
Turn the environmental light back on so the rendering includes both environmental and artificial lighting. This rendering is really coming together!
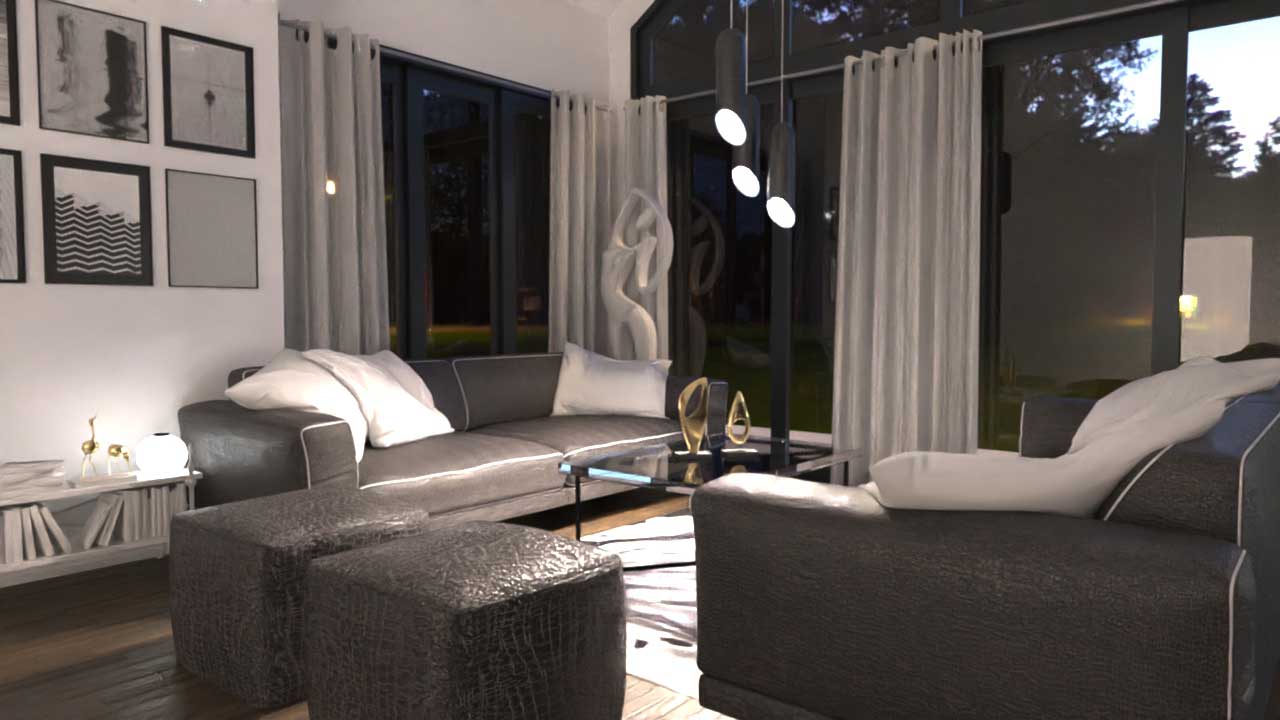
Step 6: Finalize and Adjust Your Rendering
In this final step, you’ll tweak the materials, environmental lighting, and artificial lighting to get to the final result. Thanks to FluidRay’s speed and ability to render in real time, you’ll immediately get an idea of how the render will look after each and every material or light change.
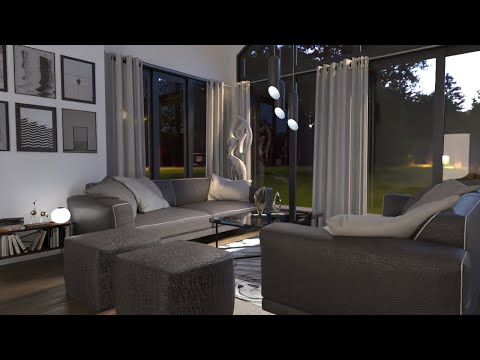
Check out this video that walks you through how to do these steps in real time.
FluidRay also offers training tutorials for more details on learning how to render images. You’ll create designs quickly and easily, freeing yourself up to focus on imagining interiors for your clients.
If you want to experience how FluidRay can help you inspire your clients, download our software for a free trial. Our pricing is inexpensive so anyone can experience the good side of rendering!