FluidRay: Jewelry Design Rendering Software
Jewelry designers traditionally would create jewelry designs with pencil and paper to share design ideas. Next, the jewelry piece was carved out in wax or plastic to give customers an opportunity to interact with the prototype and decide if the piece was right. While many designers still create models this way, rendering software will take a jewelers design ideas to the next level. Now, it is much more convenient, fast, and cost effective to create realistic models using a rendering software, like FluidRay, to communicate design ideas. Are you a jewelry designer who is considering incorporating rendering software into your workflow? Keep reading to learn more about the many benefits rendering software offers to jewelry designers.
Benefits to Using FluidRay Rendering Software for Jewelry Design:
Design in Real Time
Quickly share multiple design options and adjust jewelry designs on the fly. Decisions are made quickly and efficiently to shave time off your projects.
Save Money
Design issues are discovered early, before materials are purchased, avoiding costly mistakes.
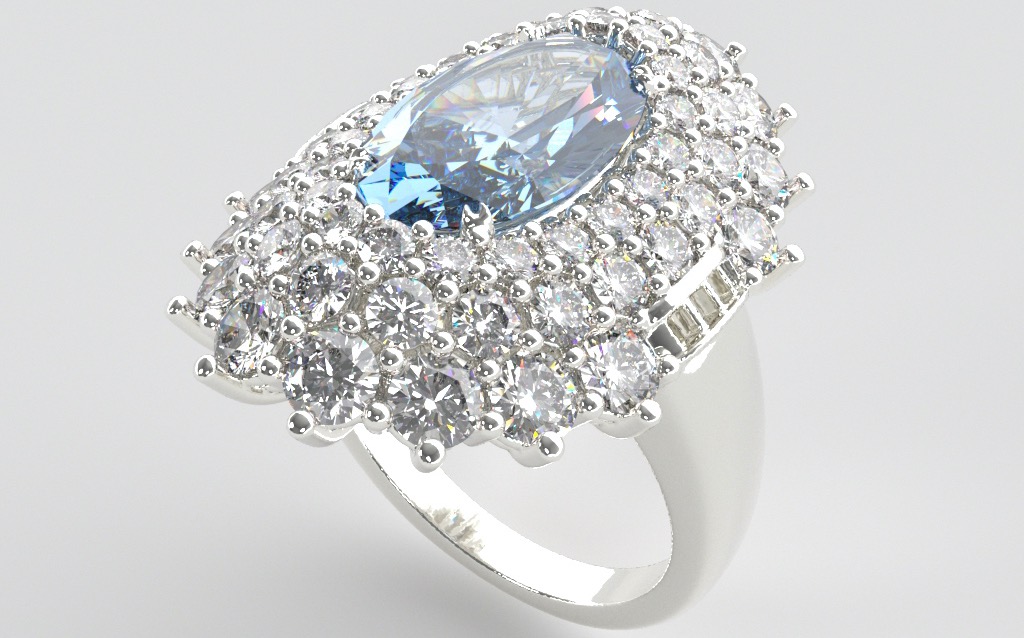
Create Detailed Designs
Customers can better visualize the final piece and sample different materials, shapes, and colors.
Communicate Ideas
Communicate design ideas and modifications to your customers quickly and effectively to keep projects moving forward.
Impress Customers
Create attention grabbing design presentations that highlight your vision and abilities winning over even the most demanding of customers.
Learn Quickly
FluidRay’s intuitive interface and straightforward menus make rendering fast and easy to learn.
Designers can create beautiful renders in 4 simple steps:
1. Import 3D Model
Directly in the FluidRay dashboard, you can import your 3d model created in a modeling tool such as SketchUp, Rhino, AutoCAD or other, simply by selecting Import from the main menu. Once your model is created, import the file into FluidRay.
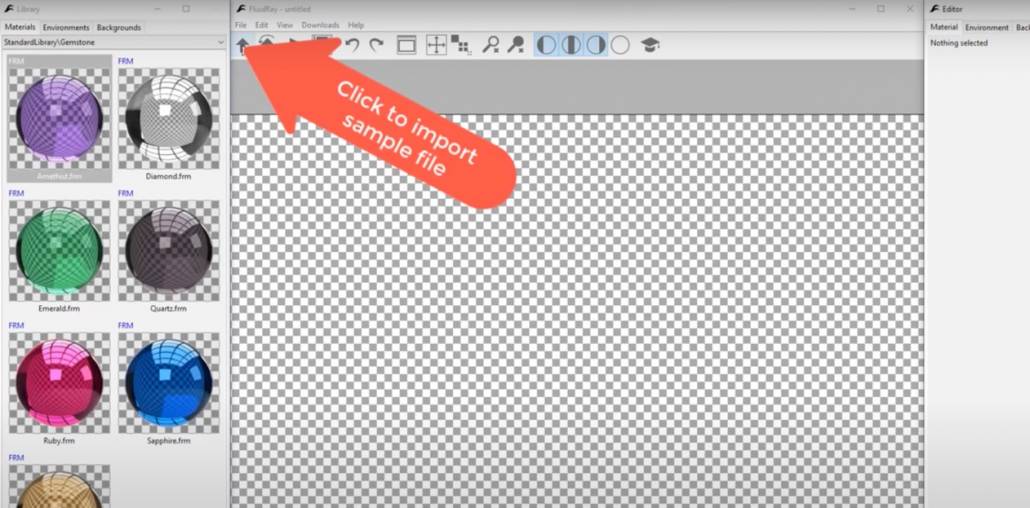
FluidRay works directly with SketchUp (.skp), Rhino OpenNurbs (.3dm), FBX (.fbx), Alias Wavefront (.obj), Collada (.dae), 3DS (.3ds, .ase), DirectX (.X), Stanford PLY (.ply), and STereoLithography (.stl).
If your filetype isn’t listed here, simply export to an .fbx file within your 3D modeling software and then import into FluidRay.
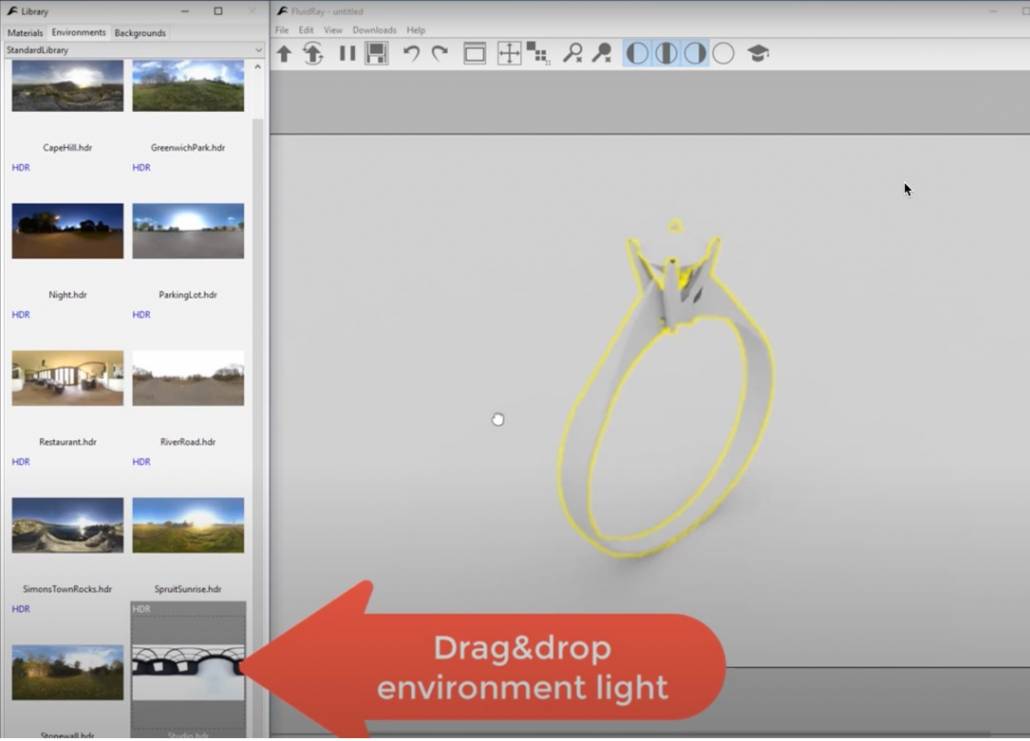
2. Apply Lighting
Environmental light comes from the outside, rather than from the inside. Environmental light is a global parameter, meaning it will affect the entire jewelry rendering, not only one part of it. Apply environmental lighting to your jewelry design to give it a realistic look and feel.
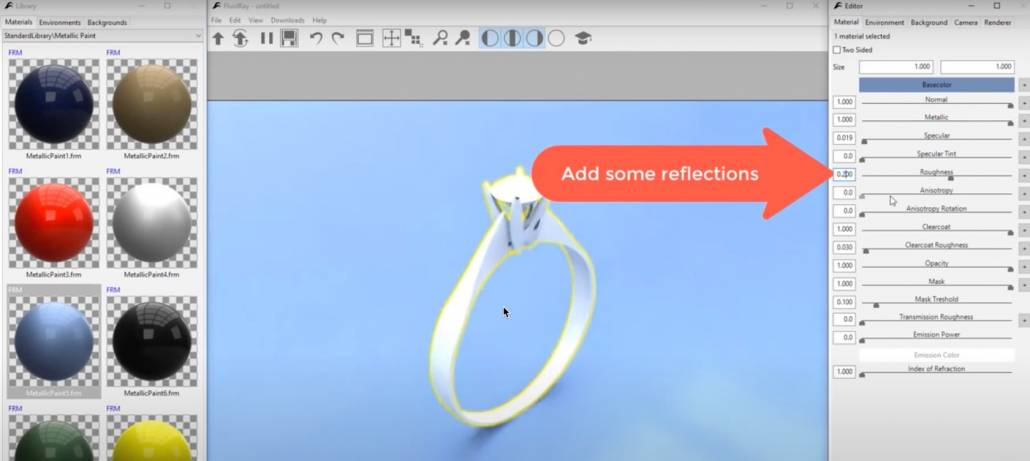
3. Add Reflections
Reflections add to the realistic nature of a rendering, particularly with jewelry or other metal materials. Adjust the reflections in real-time until the piece looks just right.
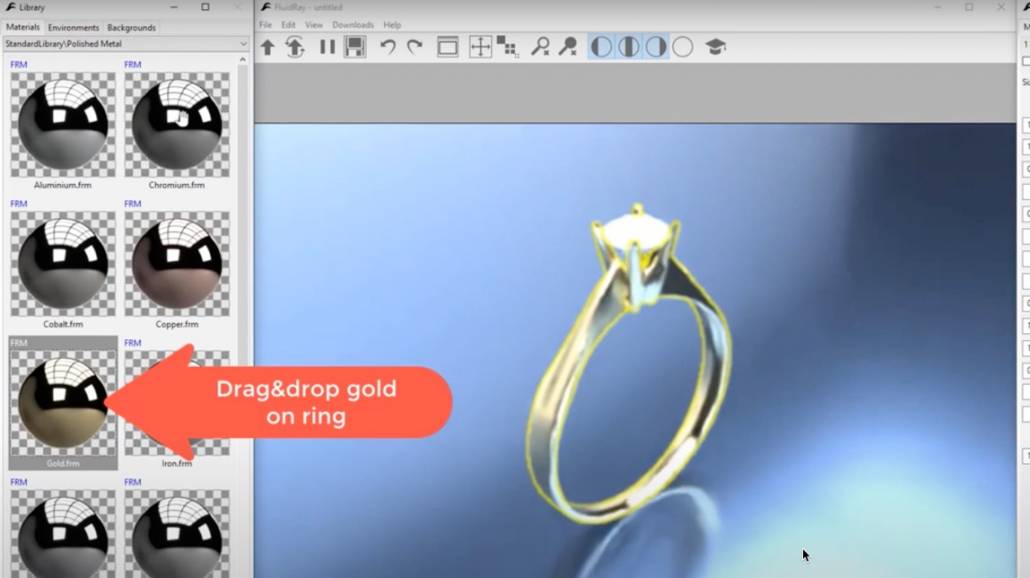
5. Assign Materials
Finally, we assign materials to the model to finish the jewelry piece. In this example, we start by adding gold. Once that is set, add the gem and you can see how the materials will react in real-time when adjusting the lighting and reflections. FluidRay’s extensive library of materials allows designers to create shapes and apply different materials until the rendering looks exactly right. Making beautiful previews of your jewelry designs is easy with FluidRay. In just a few minutes you can turn your jewelry prototype into a real-life photo-realistic image.
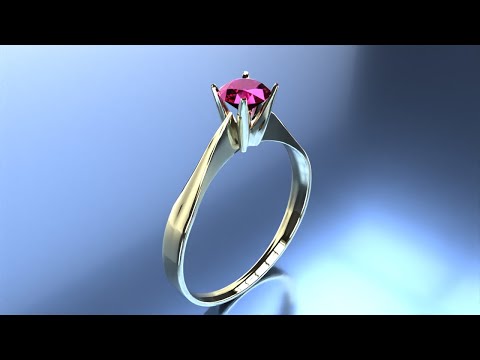
This video provides a quick tutorial on how to create a jewelry rendering in FluidRay.
Are you ready to learn rendering for your next jewelry design project? Our pricing is inexpensive and we offer a free trial so you can see how fast and easy it is to turn your 3D models into realistic images that will inspire your jewelry customers. To learn how to create beautiful jewelry renderings in FluidRay, we provide a library of training tutorials.
See for yourself how quickly you can go from a 3D model to a beautiful FluidRay rendering. Experience the good side of rendering today!
Try FluidRay For Free!