
5 Expert Tips for a Beautiful Architectural Rendering
Make no mistake about it, creating the perfect architectural rendering can be time consuming and frustrating. The amount of detail, materials, colors, and textures that go into creating a beautiful rendering can quickly become overwhelming. With that said, a few simple tips can help take your architectural rendering to the next level so you can effectively communicate your designs and architectural talents to your clients. When done right, renderings will set you apart from your competition and demonstrate your capabilities. The FluidRay team has curated our 5 top expert tips to help you create beautiful architectural renderings.

1. Create Believable Surroundings
To create a realistic architectural rendering, include believable surroundings to help set the feeling of the image. Selecting an appropriate background will draw the viewer into the rendering and help them experience the details of the final architectural design. Consider details like sky, ground, natural bodies of water, trees, and other nearby structures and aim for simple, yet accurate, details. Use natural colors and minimize complicated scenes for an architectural rendering that will impress viewers and highlight your architectural design abilities.
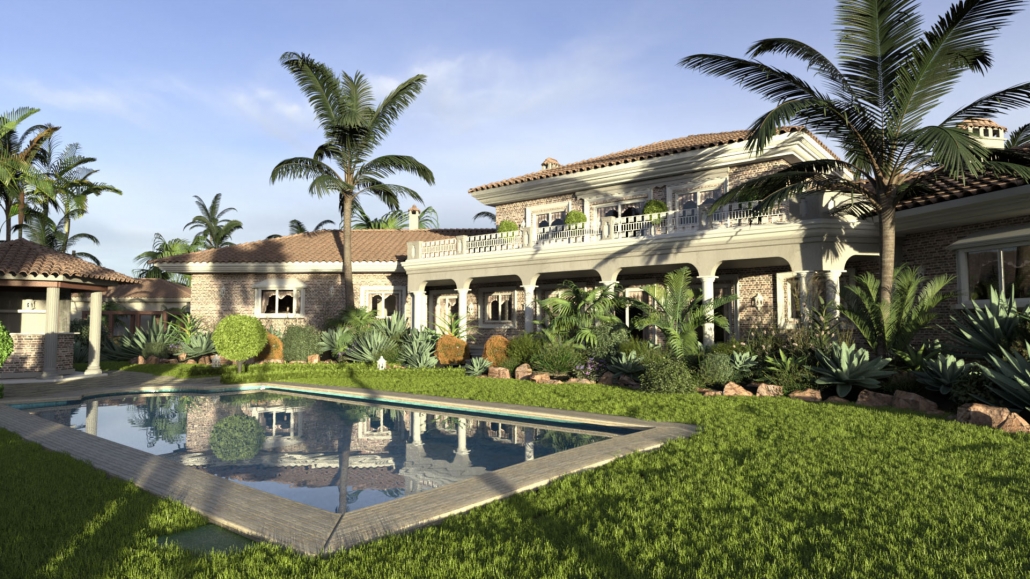
2. Illuminate, Illuminate, Illuminate
One of the most important aspects of an architectural rendering is the lighting. You’ll want to pay attention to both environmental lighting and artificial lighting. Creating these lighting effects in FluidRay is fast, easy, and produces beautiful results that will impress your clients! Get this right and your rendering is realistic and beautiful. Done incorrectly though, your rendering is awkward. Luckily, with a little attention, illuminating your architectural rendering properly is easy. In fact, this short architectural rendering tutorial explains how to set lighting in your FluidRay rendering. Note, that while this tutorial starts with a Rhino 3d model, FluidRay is compatible with most 3d modeling software applications.

3. Take Advantage of Caustics
Caustics are the flickers of light that come off water and are a significant contributor to lighting in the real world. In rendering, these flickers are often quite tricky to perfect. Designers will often avoid the need for caustics by leaving water out of their renderings. Including caustics though makes a rendering that much more believable. FluidRay handles caustics effectively and efficiently, allowing you to take advantage of this important lighting detail. Go ahead and include fountains or ponds in your architectural rendering!
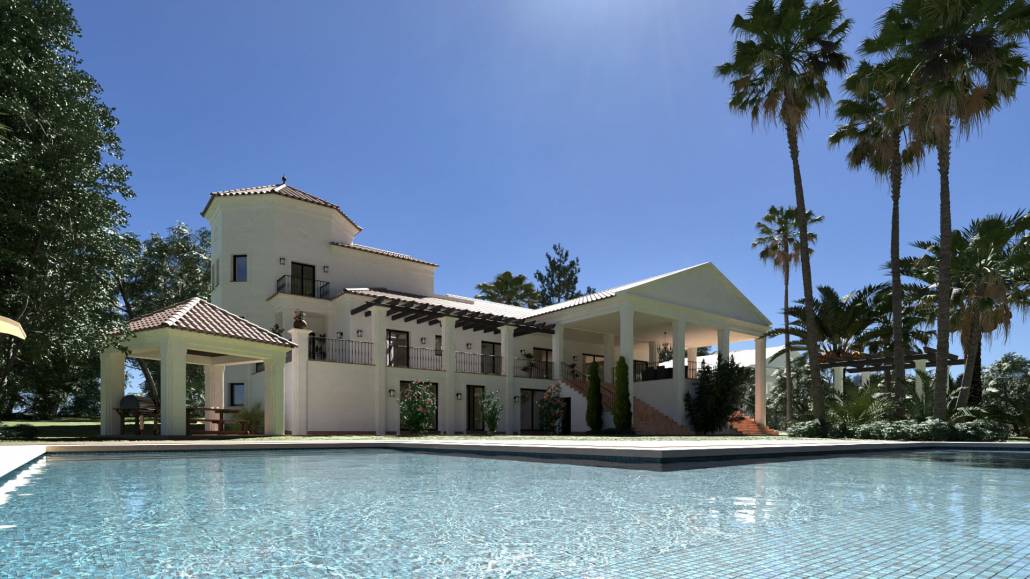
4. Refine Textures and Materials
An architectural rendering incorporates many colors, textures, and materials. Certain materials and textures will look different depending on the situation and especially the time of the day. For example, if your rendering is intended to look like a photograph shot during the morning golden hour, you’ll want the rendering to look bright and warm and not “orangey”. Refine textures and materials to look realistic to the environment and include the appropriate level of dullness or shine. This tutorial describes how to apply textures and materials to your rendering. Because FluidRay renders in real-time, you can quickly adjust textures and materials in the viewport until the rendering looks just right.
5. Determine Your Focal Point/Camera Position
Setting the focal point of a rendering to be viewed from a specific angle or point of view allows you to create a certain tone and more natural look. Perhaps you want your image to be viewed from above or from an angle. Or, perhaps you want to focus on a small portion of the building to highlight a specific feature. Consider what you are trying to emphasize in your rendering and choose a focal point accordingly.
FluidRay helps architects easily create beautiful architectural renderings. If you want to experience the power of how FluidRay can help you create expert architectural renderings, download our software for a free trial. Our pricing is inexpensive and we offer an extensive library of tutorials so anyone can experience the good side of rendering!
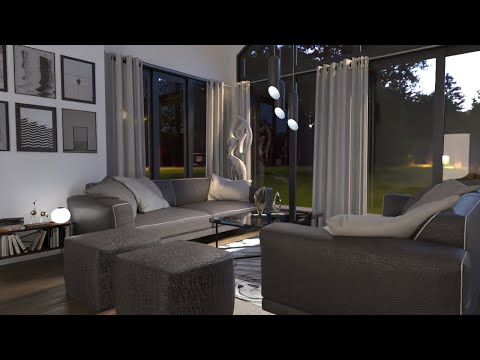
How to Create Realistic Interior Lighting with FluidRay
We are in trying times. No matter each of our specific situations, everyone has been affected by the global pandemic and we’ve all had to modify our day to day lives in order to keep our communities safe. The FluidRay team wishes everyone the best as we all adjust.
Are you able to work remotely? Why not use this time to refine your rendering skills with these tips on how to use FluidRay to create renderings with realistic lighting?
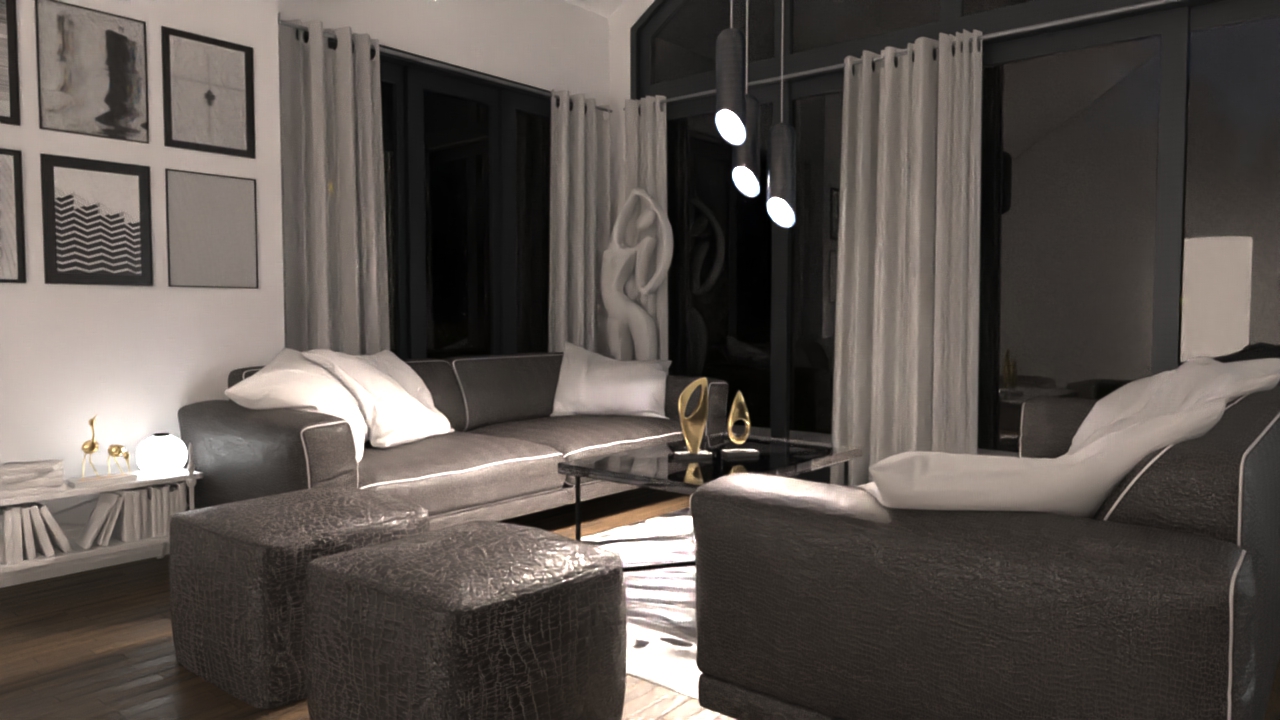
Proper interior lighting is crucial when designing an interior, particularly when working to create the ambiance of a room. Lighting adds both style and function and determines the mood of the space. Perfecting the lighting effects in 3D renderings enables designers to accurately communicate the intended mood for a room. Creating lighting effects in FluidRay is fast, easy, and produces beautiful results that will impress your clients!
Keep reading for detailed instructions on how to bring your renderings to life with interior lighting.
Step 1: Import Your 3D Model
Create your 3D model in your favorite modeling software. We used SketchUp for this example.
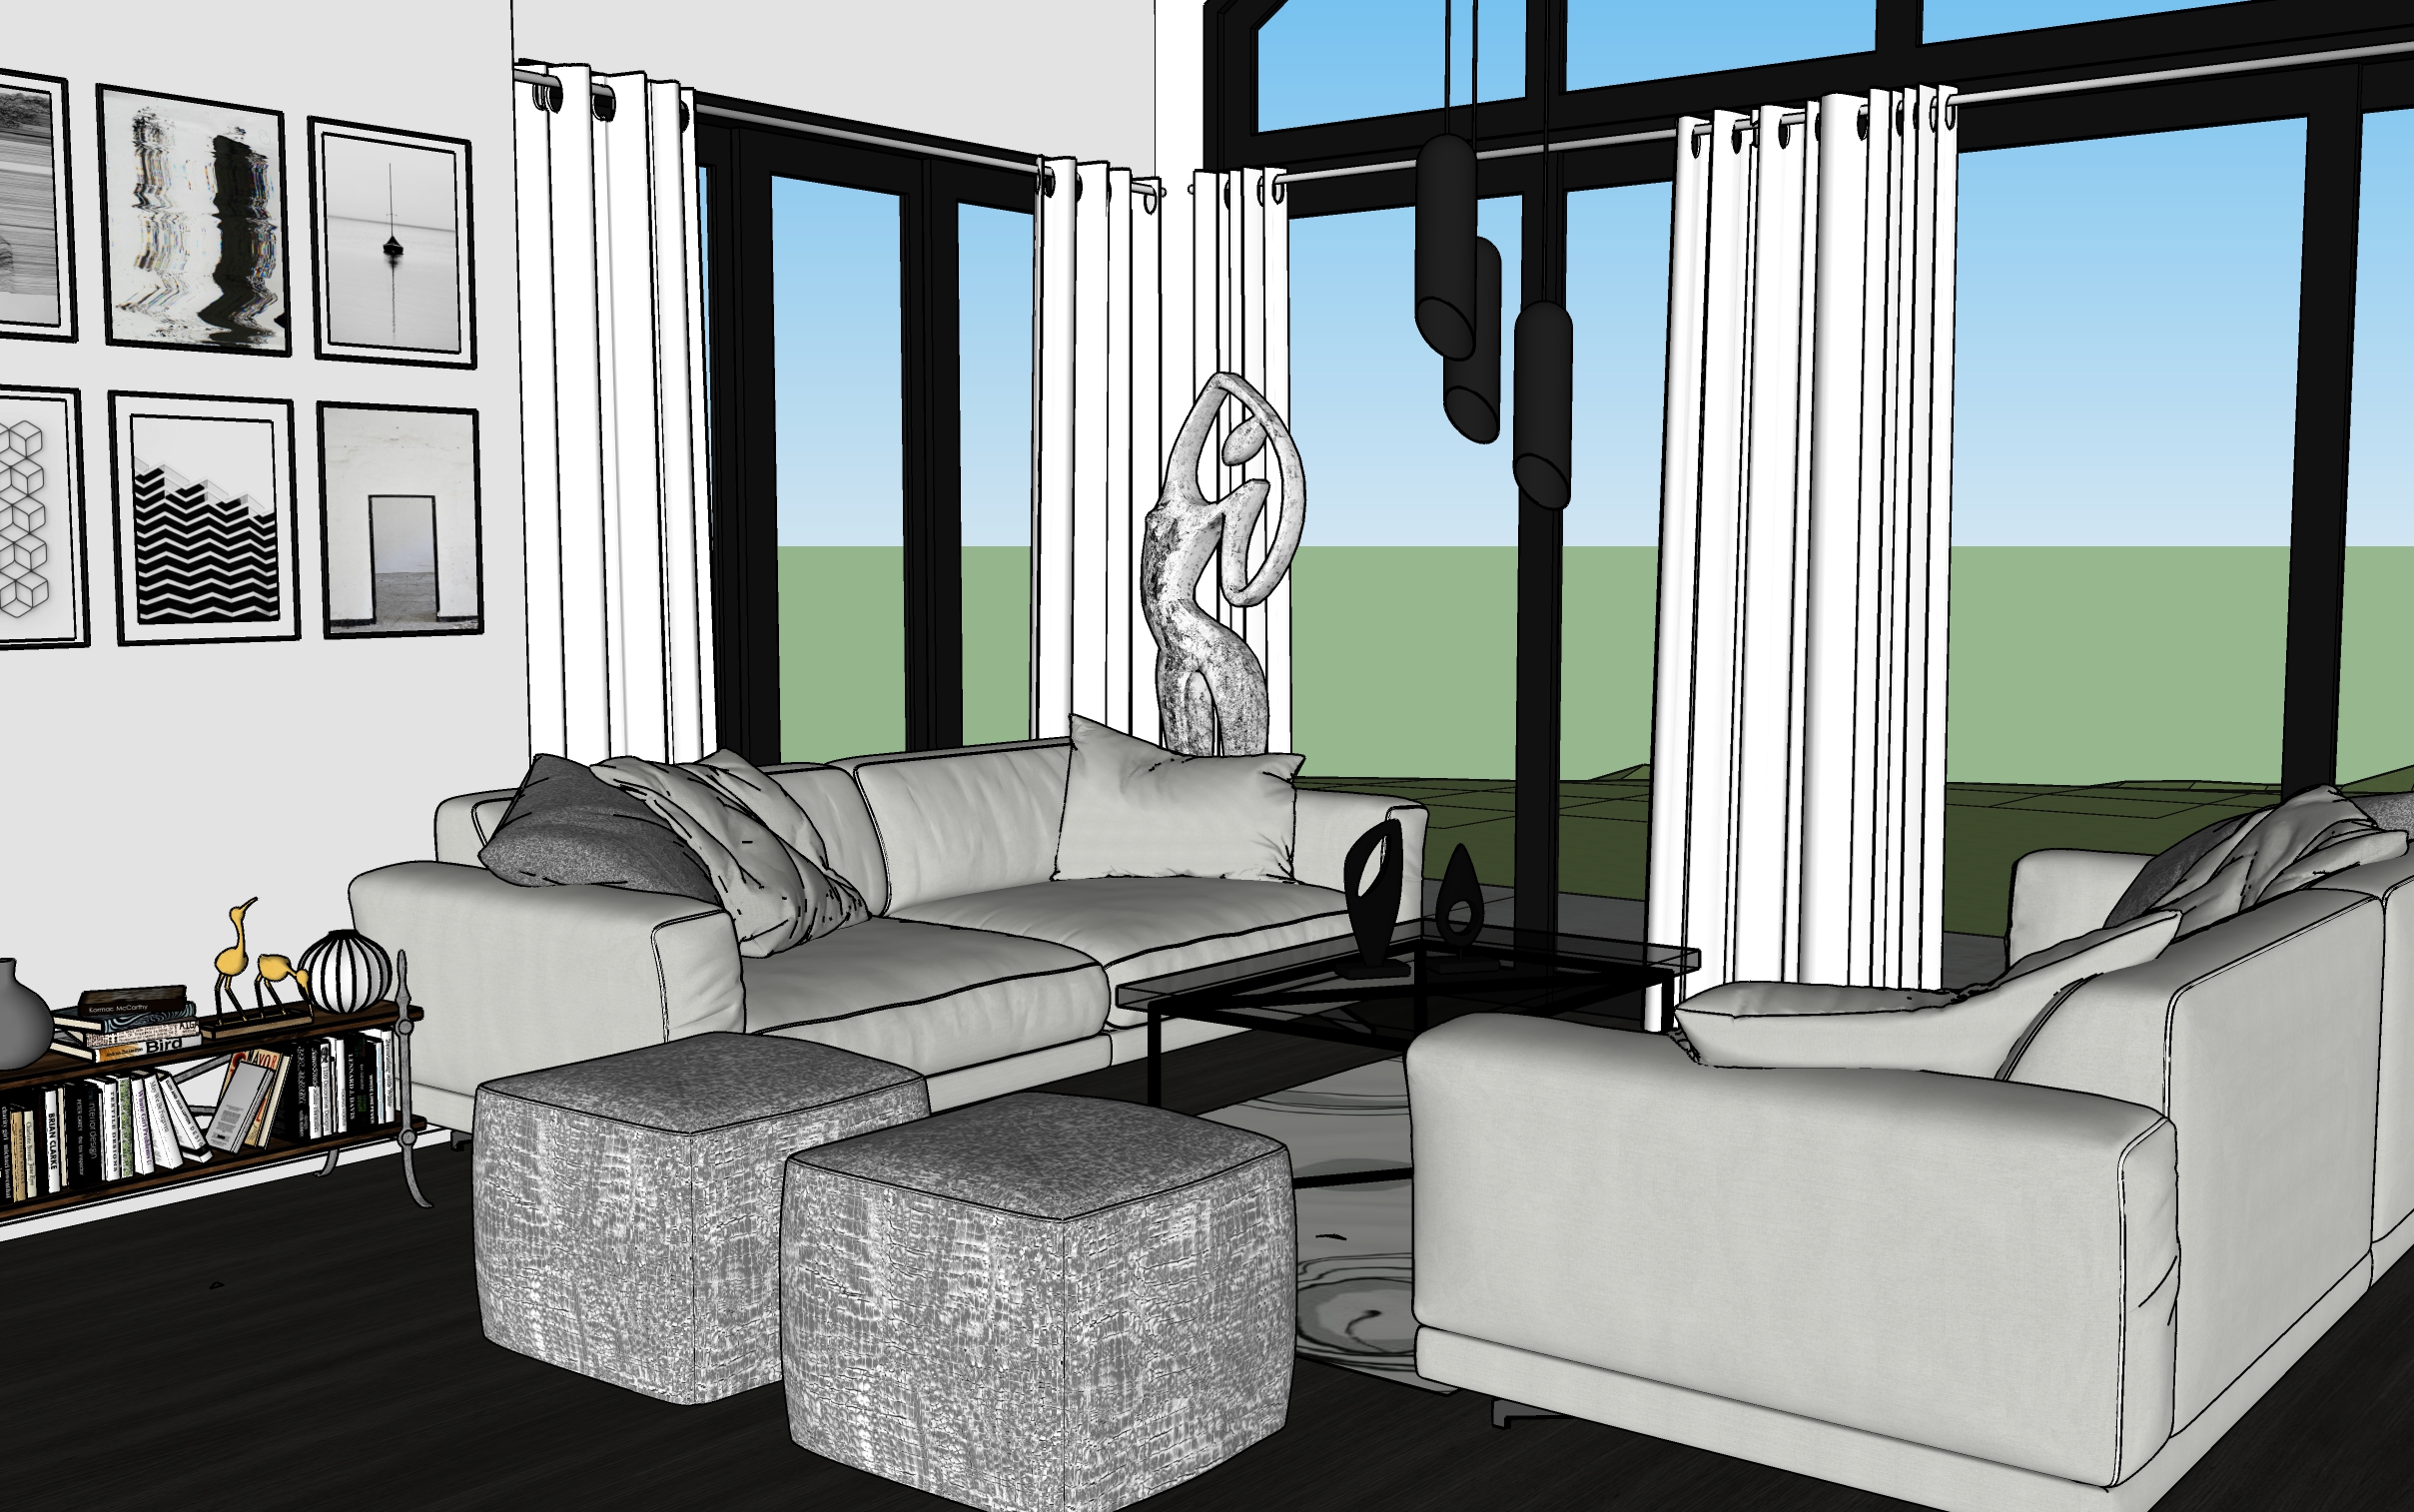
livingroom.skp
Once your model is created, import the file into FluidRay.

FluidRay works directly with SketchUp (.skp), Rhino OpenNurbs (.3dm), FBX (.fbx), Alias Wavefront (.obj), Collada (.dae), 3DS (.3ds, .ase), DirectX (.X), Stanford PLY (.ply), and STereoLithography (.stl).
If your filetype isn’t listed here, simply export to an .fbx file within your 3D modeling software and then import into FluidRay.
Step 2: Set Materials
Let’s begin by setting the materials in the model. By setting materials before adjusting the lighting, you can see how the materials will react in real time when adjusting the lighting. Select an object from the model and then from the drop down menu in the Materials tab, drag and drop the desired material into your rendering. FluidRay has a large library of high quality materials from which to choose and the ability to import additional materials.
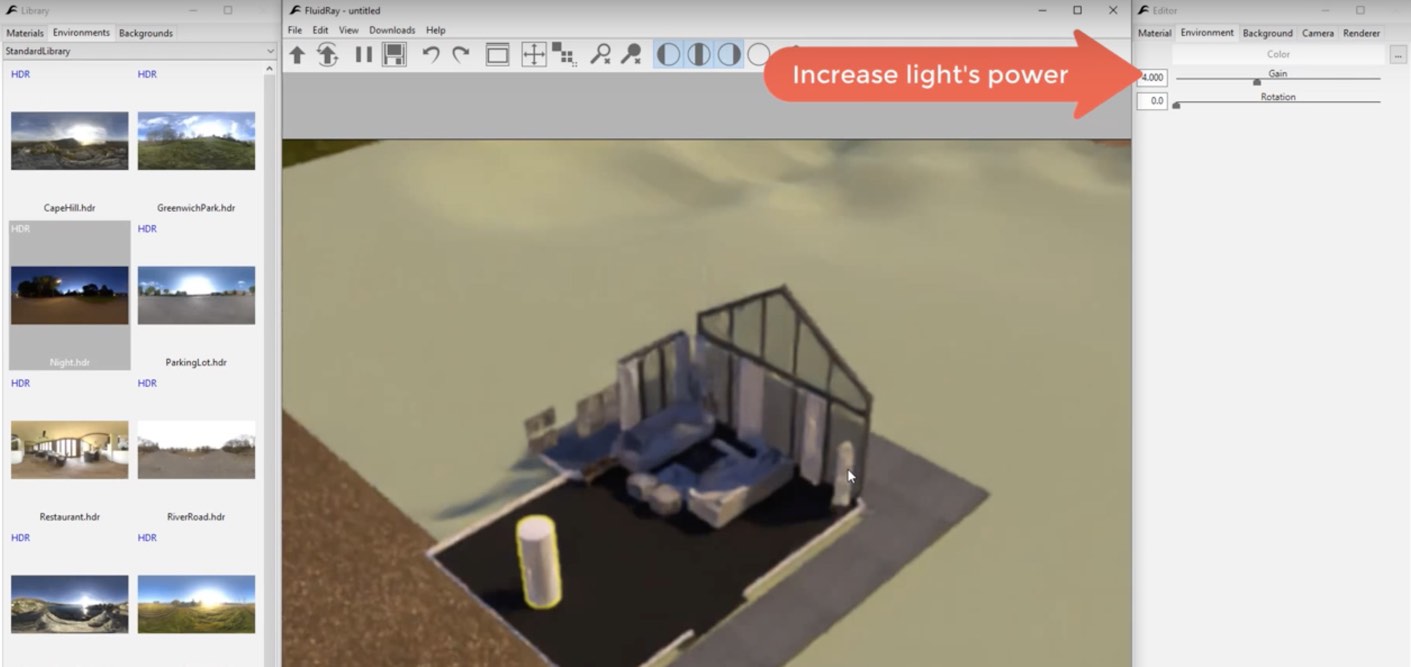
Step 3: Add Environmental Light
Environmental light comes from the outside, rather than from the inside. Environmental light is a global parameter, meaning it will affect the entire rendering, not only one part of it.
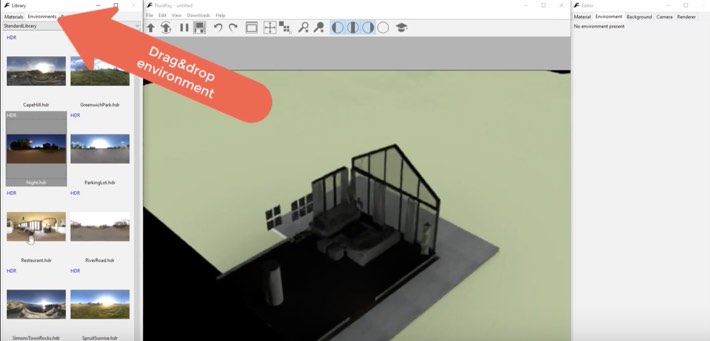
In this example, we start with the night environment and then we increase the light’s power.
You can see the room in our model takes on light from the environment as if it is night time outside. Increase the light’s power in the right panel using the Environment tab.
Step 4: Add Artificial Light
Artificial light includes overhead lights as well as table or floor lamps. We recommend applying the artificial light first without the environmental lights. Simply select the surface you want to emit light and tweak its emission power and color. You can also drag and drop an emissive material onto the surface.
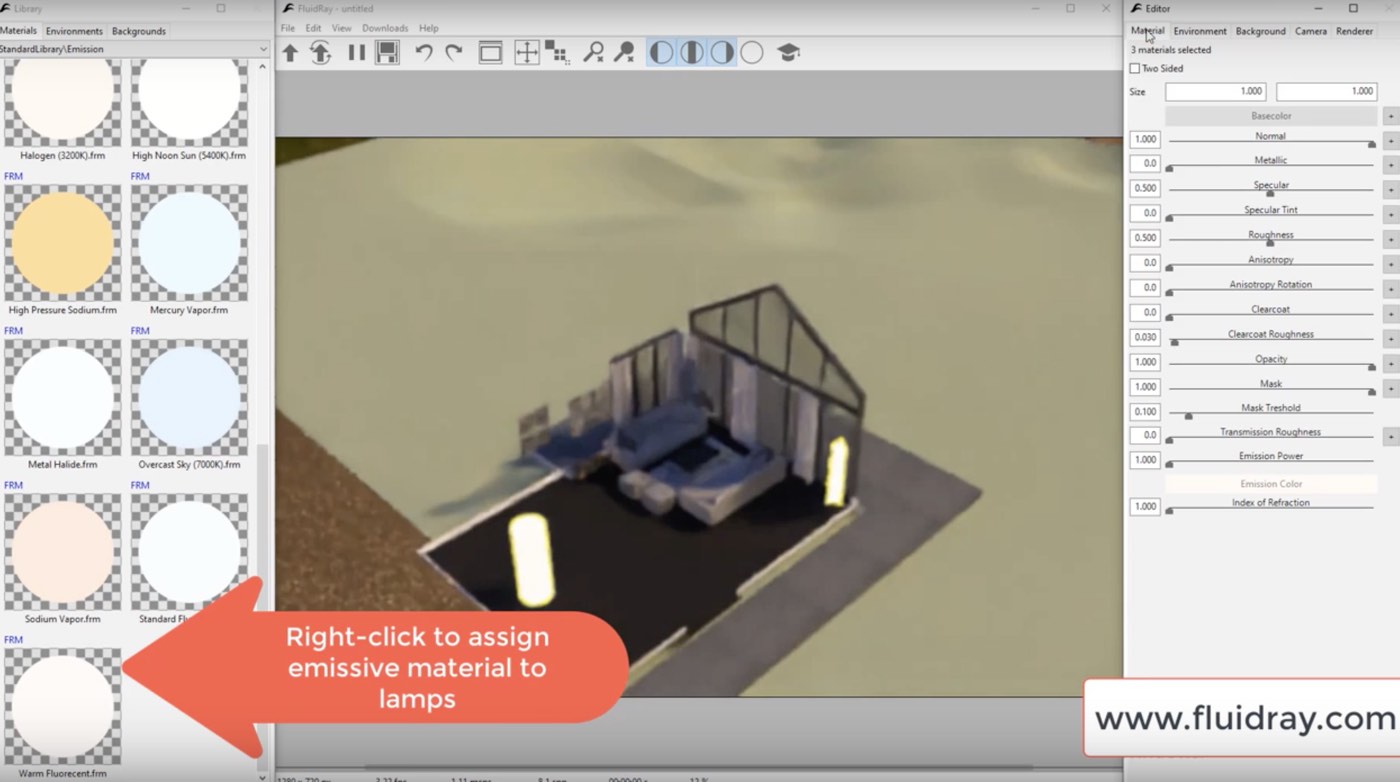
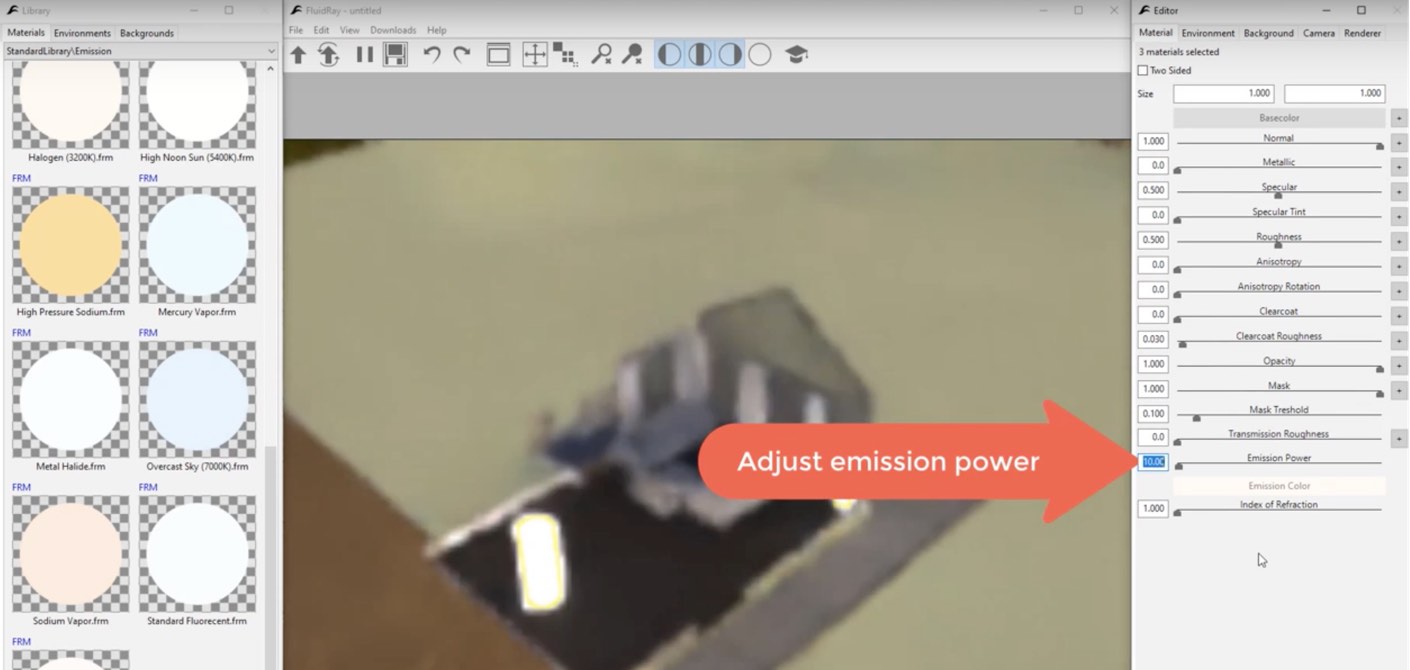
Go through these same steps for each of the artificial lights in your rendering.
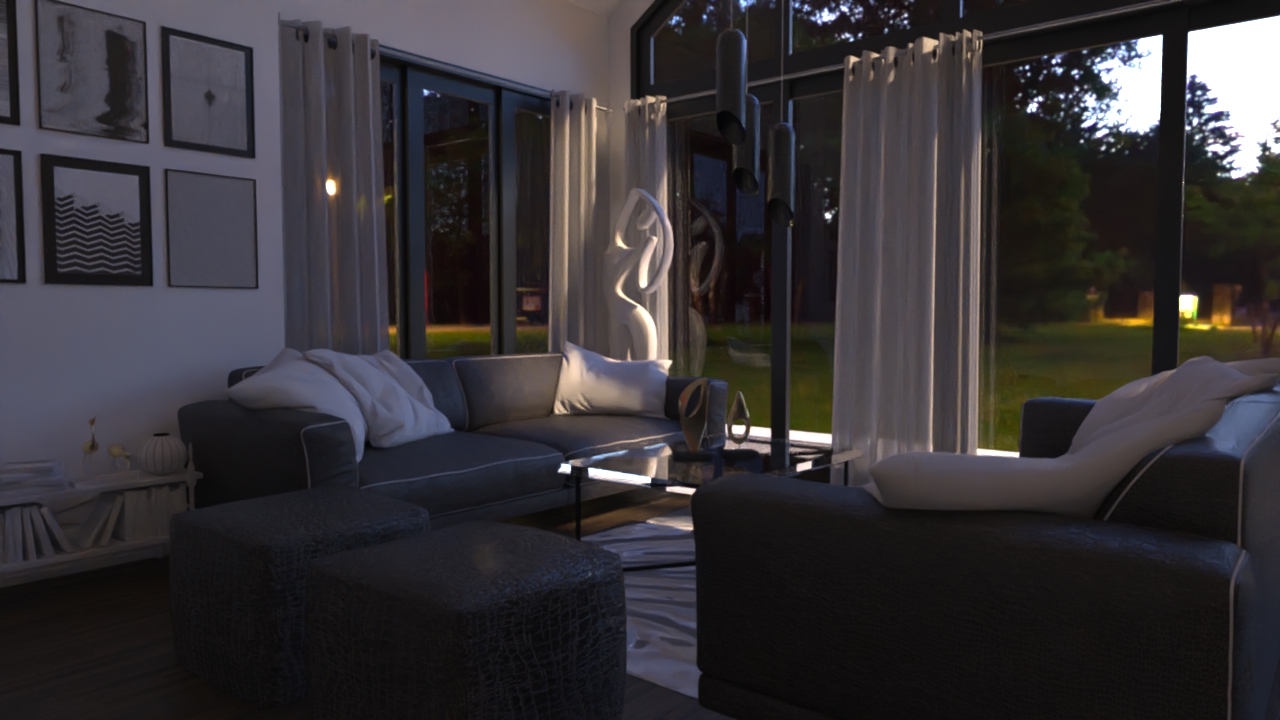
Step 5: Turn Environmental Light Back On
Turn the environmental light back on so the rendering includes both environmental and artificial lighting. This rendering is really coming together!
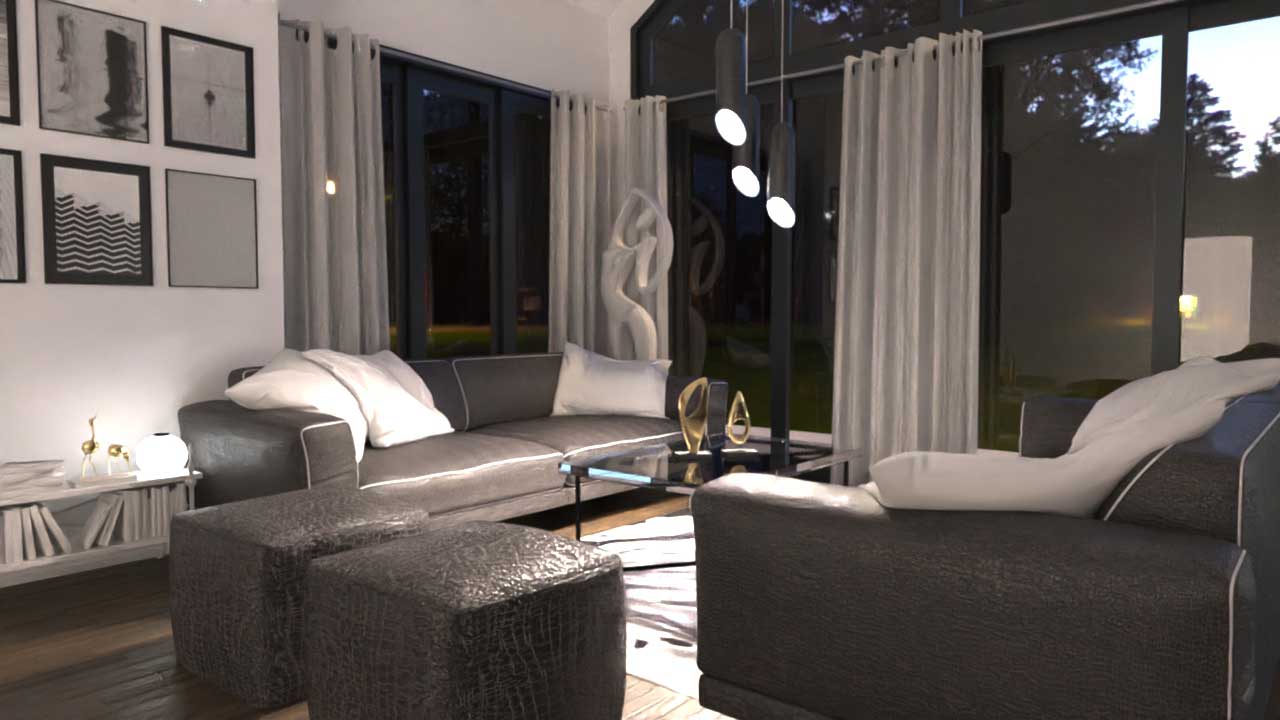
Step 6: Finalize and Adjust Your Rendering
In this final step, you’ll tweak the materials, environmental lighting, and artificial lighting to get to the final result. Thanks to FluidRay’s speed and ability to render in real time, you’ll immediately get an idea of how the render will look after each and every material or light change.
Check out this video that walks you through how to do these steps in real time.
FluidRay also offers training tutorials for more details on learning how to render images. You’ll create designs quickly and easily, freeing yourself up to focus on imagining interiors for your clients.
If you want to experience how FluidRay can help you inspire your clients, download our software for a free trial. Our pricing is inexpensive so anyone can experience the good side of rendering!
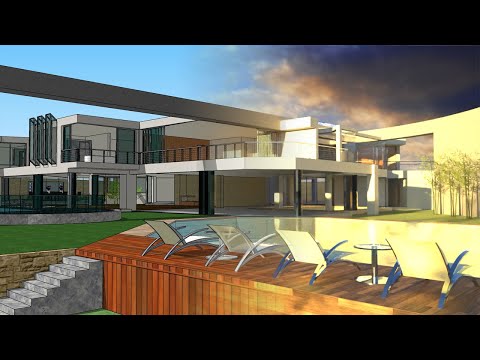
Cool Video on the Merits of HDRI for 3D Rendering
The images you use as sources and output have a big impact on the realism of your renders. This video from dimensiont on YouTube looks at the value of using HDRI images when doing renderings. I think the video could use a different soundtrack, but the examples given are convincing.
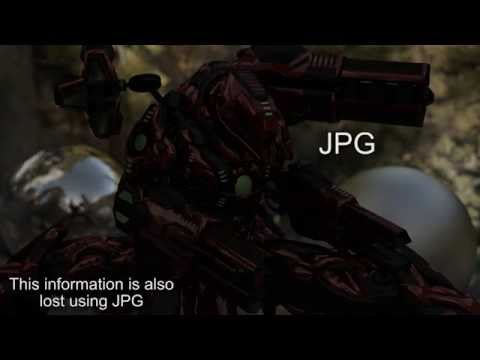
In the video, you’ll see the difference in colors, shadows, lighting and reflections between high dynamic range images and formats like jpeg and png. The video does a great job of making the difference in contrast and detail obvious. It also gives you some hints to the value for different lighting environments though I’d say the video could use more lighting examples.
Watch this video if you’re working on placing made objects and people into real-world environments or struggling to fine-tune a render.
How to Use FluidRay RT Volumetrics for Fast Fog Rendering
FluidRay RT tutorial on how to add real-time participating media to a scene, supporting multiple scatterings.
Volumetric effects, such as fog, god rays and clouds can add great realism to a scene.
FluidRay RT supports rendering homogeneous (i.e. the density is constant in the medium, such as fog) and heterogeneous media (i.e. the density varies in the medium, such as clouds). This video will cover:
- Adding a homogeneous medium to the scene
- Adding an object containing a homogeneous medium using drag & drop
- Change medium parameters
For more tutorials, check out the Tutorial Page.
How to Use FluidRay RT Ambient Occlusion for Fast Preview Rendering
FluidRay RT tutorial on how to render ambient occlusion in real-time.
Ambient occlusion is used to quickly generate a preview of scenes by approximating the light reaching each shaded point, based on how much the point is “occluded” by the surrounding geometry. This video will cover:
- Using the Occlusion Integrator to render Ambient Occlusion
- Tweak Ambient Occlusion Paramenters
For more tutorials, check out the Tutorial Page.